
Sunday, November 27, 2011
It Will Continue
I had originally planned to start a new blog when I started a new kayak Build, but it occurs to me that I have already written enough about "my next build" on this blog, so I might as well continue here.
 As aforementioned, I decided to go ahead with using my cedar strips, without the coves and beads.Yesterday, I planed all the strips down to a thickness just under 1/4' (7/32?) with my (repaired) thickness planer. Quite a lengthy job, and I made, in the parlance of the Younger Generation, an Epic Mess. After cleaning up this morning, I stacked the strips & counted the lineal feet-700, about twice as much red cedar as white. I hope its enough-don't want to have make more!
Thursday, November 24, 2011
The Next Plan
So, when we had last left this saga, I had given up on the idea of making my own bead-and-cove strips, because I had planed the strips too thin. However, after more reading, I discovered that you can indeed, build a strip deck without the coves and beads, by planing a "rolling bevel" as necessary, into each strip. You can even plane the strips thinner than 1/4", maybe 3/16 (weight savings). So I'm going to try it that way, challenge myself, get frustrated, learn a bunch along the way, and (hopefully) come out with a good result.
CLC sells bead-and-cove strips of White Cedar and Western Red Cedar. I could not find any decent White Cedar anywhere, but the nice gentleman at Liberty Cedar, after hearing my plans, suggested Alaskan Yellow Cedar. Its very nearly white in color, but it seems very hard & heavy for "cedar". I'd better use it sparingly, for "accents"
CLC sells bead-and-cove strips of White Cedar and Western Red Cedar. I could not find any decent White Cedar anywhere, but the nice gentleman at Liberty Cedar, after hearing my plans, suggested Alaskan Yellow Cedar. Its very nearly white in color, but it seems very hard & heavy for "cedar". I'd better use it sparingly, for "accents"
Tuesday, November 15, 2011
Plans & Projects, Continued
I decided that I couldn't bring myself to attack the beautiful deck of my kayak with a jigsaw for any reason. so I put a fresh coat of varnish on, and tried to sell it on EBay and CLC's website. Unsatisfactory results on Ebay, and some interest from a guy on the CLC site, but no sale. Its hanging from the rafters in my basement right now. I decided to build a new SW17 Hybrid, and try to sell the old 'yak in the spring, when people are acually interested in kayaks.
Unfortunately, I also decided to try to mill my own bead-and-cove strips. After spending over $100 on wood, generating at least two bags of wood shavings, much table sawing and planing , I realized that I'd planed the strips too thin. I could not cut a strong "cove", no matter how I adjusted the router. So I now have a significant pile of too-thin cedar strips in my basement. I even managed to wreck my back in the process, somehow. The web page I read about how to do it said to mill the strips "a fraction of an inch thicker than 1/4", but I really think it would have to be almost 1/16' to leave room for a strong cove. So I gave up on the idea, and decided to buy an entire kit this winter.
Unfortunately, I also decided to try to mill my own bead-and-cove strips. After spending over $100 on wood, generating at least two bags of wood shavings, much table sawing and planing , I realized that I'd planed the strips too thin. I could not cut a strong "cove", no matter how I adjusted the router. So I now have a significant pile of too-thin cedar strips in my basement. I even managed to wreck my back in the process, somehow. The web page I read about how to do it said to mill the strips "a fraction of an inch thicker than 1/4", but I really think it would have to be almost 1/16' to leave room for a strong cove. So I gave up on the idea, and decided to buy an entire kit this winter.
Monday, October 24, 2011
Plans, Projects
I need stuff to do during the winter.
When I make plans, I have a tendency to be modest, either from an inherent lack of confidence, or a desire for a high probability of success. So, I built my Shearwater, having bought the construction manual & studied it, months in advance. After using it for a season, I began to want to build my "Ultimate Kayak". I test-paddled a Night Heron Hybrid at the CLC demo, and thought that my SW was actually faster, so I decided on a Shearwater 17 Hybrid.
Plan A- Sell my present boat, hopefully for enough $$ to buy the next kit, and build the Hybrid this winter. Build a smaller "toy" boat next winter, for fun.
"Plan A" flunked when I tried to sell the kayak. No bites on Craigslist or CLC's website. Lots of watchers and views on EBay, but no serious bidding. I considered keeping the 1st boat, building the Hybrid anyway, and attempting to sell the old one next spring, but I don't know that it will sell any better then, either. Then I'd be stuck with two 17' kayaks in my tiny basement.
Plan B- Retrofit my present 'yak with a cedar-stripped deck.
Hmm. It seems that it can be done, but with difficulty, and with the very real possibility of making a hash of the whole thing. The idea set my mind going with problems, solutions, tools to buy, techniques to learn, etc. I have gone though this before, like when I was considering buying the house next door-I run all the problems through my mind, collecting solutions. In the end, I left that house alone, having judged that it wasn't worth the effort. Now this time, I was more equal to the challenge, except for one thing-I just went downstairs to look at what I have to do, and I decided that I probably couldn't make myself take a jigsaw to that beautiful deck for any reason. I had just sanded and re-varnished the deck, preparatory to sale, and it looks pretty darned nice.
So:
Plan C- wait until January, then build my "toy kayak" this winter. I won't wreck anything, and it'll keep me busy.
Thursday, September 15, 2011
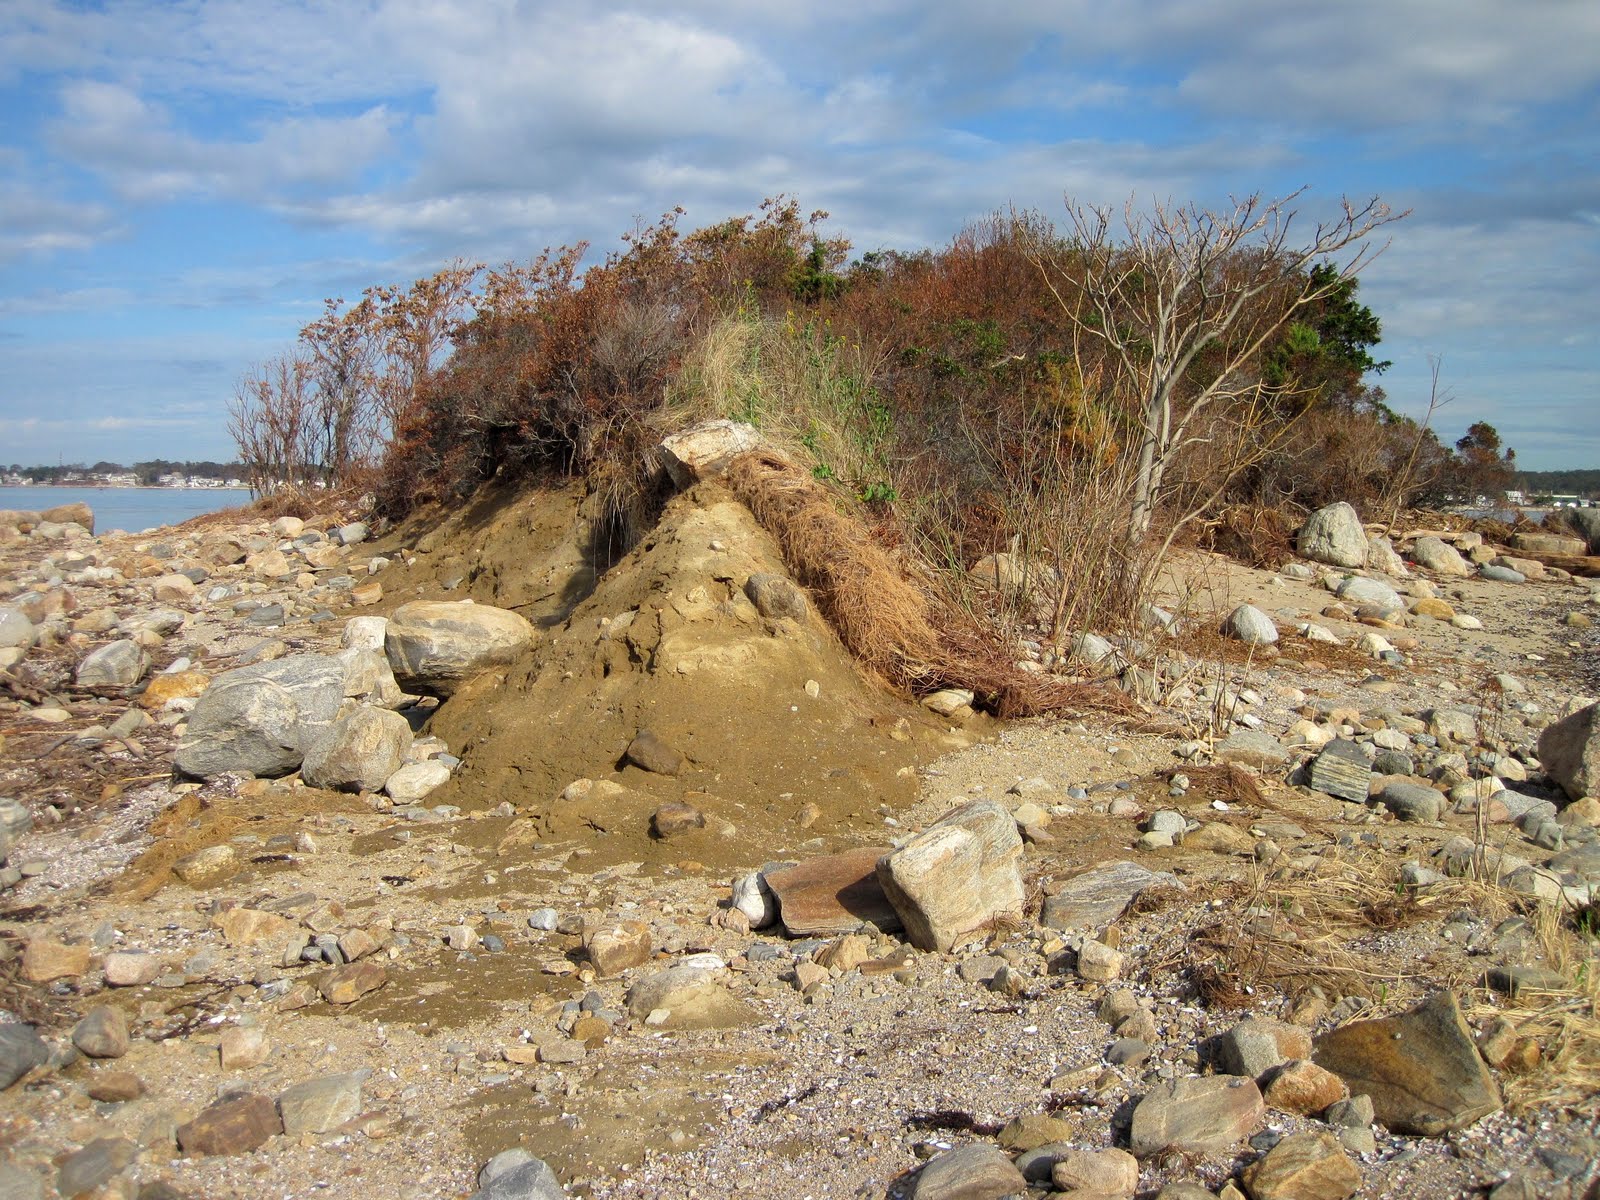
Hamburg Cove

Another bay of the Connecticut River. We tried it last year, going up cove until we ran out of water, but this time, I went towards the river.


Nice place for a paddle-less obnoxious boat traffic.
Saturday, September 10, 2011
Duck And Menunketesuck Islands


From here, it was really just a 15 minute sprint to Duck Island. Three sailboats at anchor. Chatted with some nice bird watching folks in a Zodiac.

On the way back, some people actually waved from their boats, kind of surprising in toney Westbrook. Back up the river a guy in a small boat was pulling up nets for crabs. He had apparently set a string of crab traps, and was going down the line. New T.V. show, "Mildest Catch"?
Friday, September 9, 2011
Ballast
I thought that this kayak was trimmed a little too far aft, that is, that the bow was a little higher than necessary. I originally tried to velcro the bottle & boat together, but it doesn't hold on the water. I got an inexpensive hold-down strap, and glued it down with a blob of epoxy. I orginally tried a full gallon of water, but it was excessive-1/2 gallon seems about right. I think it helps, but I'm still experimenting.


Sunday, August 21, 2011
Self-Rescue Techniques, Ongoing
Watching YouTube videos doesn't do it. There is no substitute for practice. The practice is more difficult than I thought it would be. I go to the same "Maiden Voyage' lake for practice, because there aren't many people around to watch me founder. The first session:
"The Cowboy Scramble: FAIL. I couldn't get my body high up enough on the boat without it flipping over on me.
"Re-Entry And Roll": FAIL. I just couldn't figure it out.
"The Ladder": PASS, (C minus). I managed to get it done, but the 'yak is awfully shaky when I'm on top of the rear deck.
"Paddle Float Re-Entry": PASS. I really dinged up my deck with the paddle, though. I discovered that I needed to use the deck rigging to hold the paddle.
The second session:
"Paddle Float Re-Entry": PASS. It got easier, once I realized that you can do it more than one way, as long as you remember to keep leaning on the float side.
"Re-Entry And Roll": FAIL. I'm going to need lessons.
"The Ladder": PASS (B minus). It works, but this boat bangs me up.
"Cowboy Scramble": FAIL. I think this works better in kayaks with higher initial stability.
Both times, I tried the self-emptying technique, where you lift the stern, and get the water out, and both times, the 'yak flips itself over, naturally. Most of the water comes out, but I go under. I think its because of the way my cheapo PFD rides up.
Well, at least I know one reliable way to get back in if I ditch.
Friday, August 5, 2011
Ram Island & Swimming Rock
Put in at Esker Point Beach in Groton. Nice area, adjacent to "private" Long Point, which would be the best place of all to put in, provided that you're a millionaire, and you live there. Went out to take a look at Ram Island, and Swimming Rock. Very busy with power boat traffic, in the channel between Groton and Fisher's Island. I'd like to try for Fisher's sometime when there is less boat traffic, like the fall. Without boats, there is an easily manageable 1-2' chop, but the near-constant traffic in the channel keeps sending 3-4 footers.
 Nearing Ram. wondered if I could beach for a minute & stretch my legs-guess again! When I was about 100 yards off, I noticed a man in a humble skiff, a bit closer in than I. Several fierce dogs tore down to the water's edge, and barked furiously at him. Glad I didn't try it. Someone's really interested in preventing trespassing.
 Mouse Island. Close into shore.
 This is either Swimming Rock, or Whale Rock. Tried not to disturb the cormorants.
 I stopped on this rock to stretch my legs. And pulled Bonehead Play Of The Summer. I'd found a little niche in the rocks, and pulled the 'yak what I thought was far enough up. Went to the other end to take this picture....and you guessed it......when I returned, the boat was 20 yards out! Dove in after it, with camera in non-watertight PFD pocket. Considered tring to get in, but instead swam back to the rock, pulling the boat, very thankful when I felt a rock underfoot.
Went back out in the direction of The Dumplings, coming closer than I had before, but the water was getting bigger, and rain threatening, so I chickened out.
I managed to dry the memory card out enough to upload this pics, but the camera is probably shot. No biggie, since I was very lucky twice today, first when someone else discovered the canine residents of Ram Island, and again when I got back to my kayak.
Saturday, July 16, 2011
Thimble Islands

Easy access from the Town Dock, if you arrive early enough to get a 4-hour parking spot.


Some of the houses almost seem bigger than the islands, as if the owners were determined to put something up. "I paid $$$$$$$$ for this island! I'm going to build on it!"


 This is Outer Thimble, one of the few uninhabited islands. A sign said "Island Closed", but I stepped off anyway. I head that they give tours, but it wasn't really that big.
Next to Outer Thimble is Horse Island, the biggest Thimble, owned by Yale University. If I had known that, I'd have visited.
Besides these two, its all very developed. You have an interesting geological feature, an archipelago of small islands, not too far from the mainland, and the development rolls in.
Sunday, July 3, 2011
Sandy Point
 Is not actually a Point at all, but an island. It seems that it was one connected to Napatree point, but a hurricane separated them. Its fortunate that it got a nice name, instead of just being referred to as "The Sandbar" or something like that.
I set out from the Barn Island launching area. Very nice ramp, with a separate area for kayaks and canoes. They even had Port-O-Sans. Today being the Sunday of a long holiday weekend, it was very busy, especially with power boaters, who always seem "busy".
This was the first time I've taken the 'yak across a significant distance of open salt water, and I had to cross a busy channel , where power boats were leaving wakes. I'm beginning to like the way the Shearwater handles chop, punching its way along. I even did a few "nose dives", right up to the hatch.
Quite a few motorboats on the Point. Zero kayaks or canoes. Much of the shore is roped off as bird nesting areas, and everywhere else had boats at anchor. Maybe it was the Holiday Weekend Crowd, but it didn't seem all that friendly to kayaks.
Once back at the ramp, I got the saltiest compliment on my kayak yet: "Whoa! Look at that thing!"
Sunday, June 19, 2011
Housatonic


Saturday, June 4, 2011
The Meet At The Beach

As I expected, it was also a "demo day" for CLC. I got to test a Night Heron, which I was considering building. I liked it, but I actually think my Shearwater is faster. They also had some exotic models: a high-speed "Mystery" and the "Aleutesque".
I got many compliments on my Kayak build ;). I had originally wondered if the whole thing would be full of gorgeous, strip-built showpieces, and while there were a few, the mood was actually much more "come-one-come-all".
One of the skin-on-frame jobs.


Wednesday, May 25, 2011
Today's Paddle
I got out of work today at 3:00, and couldn't resist loading 'er up. Went to Haddam Meadows Park, on the Connecticut river. I had sent my "modern" paddle out to be shortened, and used my home made one. I had also made a "Greenland" paddle, according to plans I found on the net, but I never really liked it. First, because I made it from a pine 2x4, and it seems heavy. Reminds me of a cricket bat. It was also wet & noisy. So, I made a slimmer & lighter modified design from cedar, which I prefer. I'm considering trying to B.S. people, and call it a "Baffin Island Paddle" (haven't you heard of it?) In either case, there seems to be a whole lot of technique involved in getting the most from a paddle.
I like my Shearwater more & more. Very wind-neutral- I feel wind, but it seems to do nothing to the boat. I'd taken my old 'yak on the same paddle last year, and it weathercocked like mad.
I like my Shearwater more & more. Very wind-neutral- I feel wind, but it seems to do nothing to the boat. I'd taken my old 'yak on the same paddle last year, and it weathercocked like mad.
On The Water
 Saturday, the sun actually threatened to make an appearance, so I headed to the Great Island launching area in Old Lyme. First salt water paddle in this 'yak. A little bit of tough going around the south end, so I beached the boat for a rest on this un-footprinted little beach.
Kayak in the reeds.
The rest of the paddle was easy, down the Back River. The cruising pace of this boat is very easy & efficient on flat water.
Saturday, May 14, 2011
The Maiden Voyage

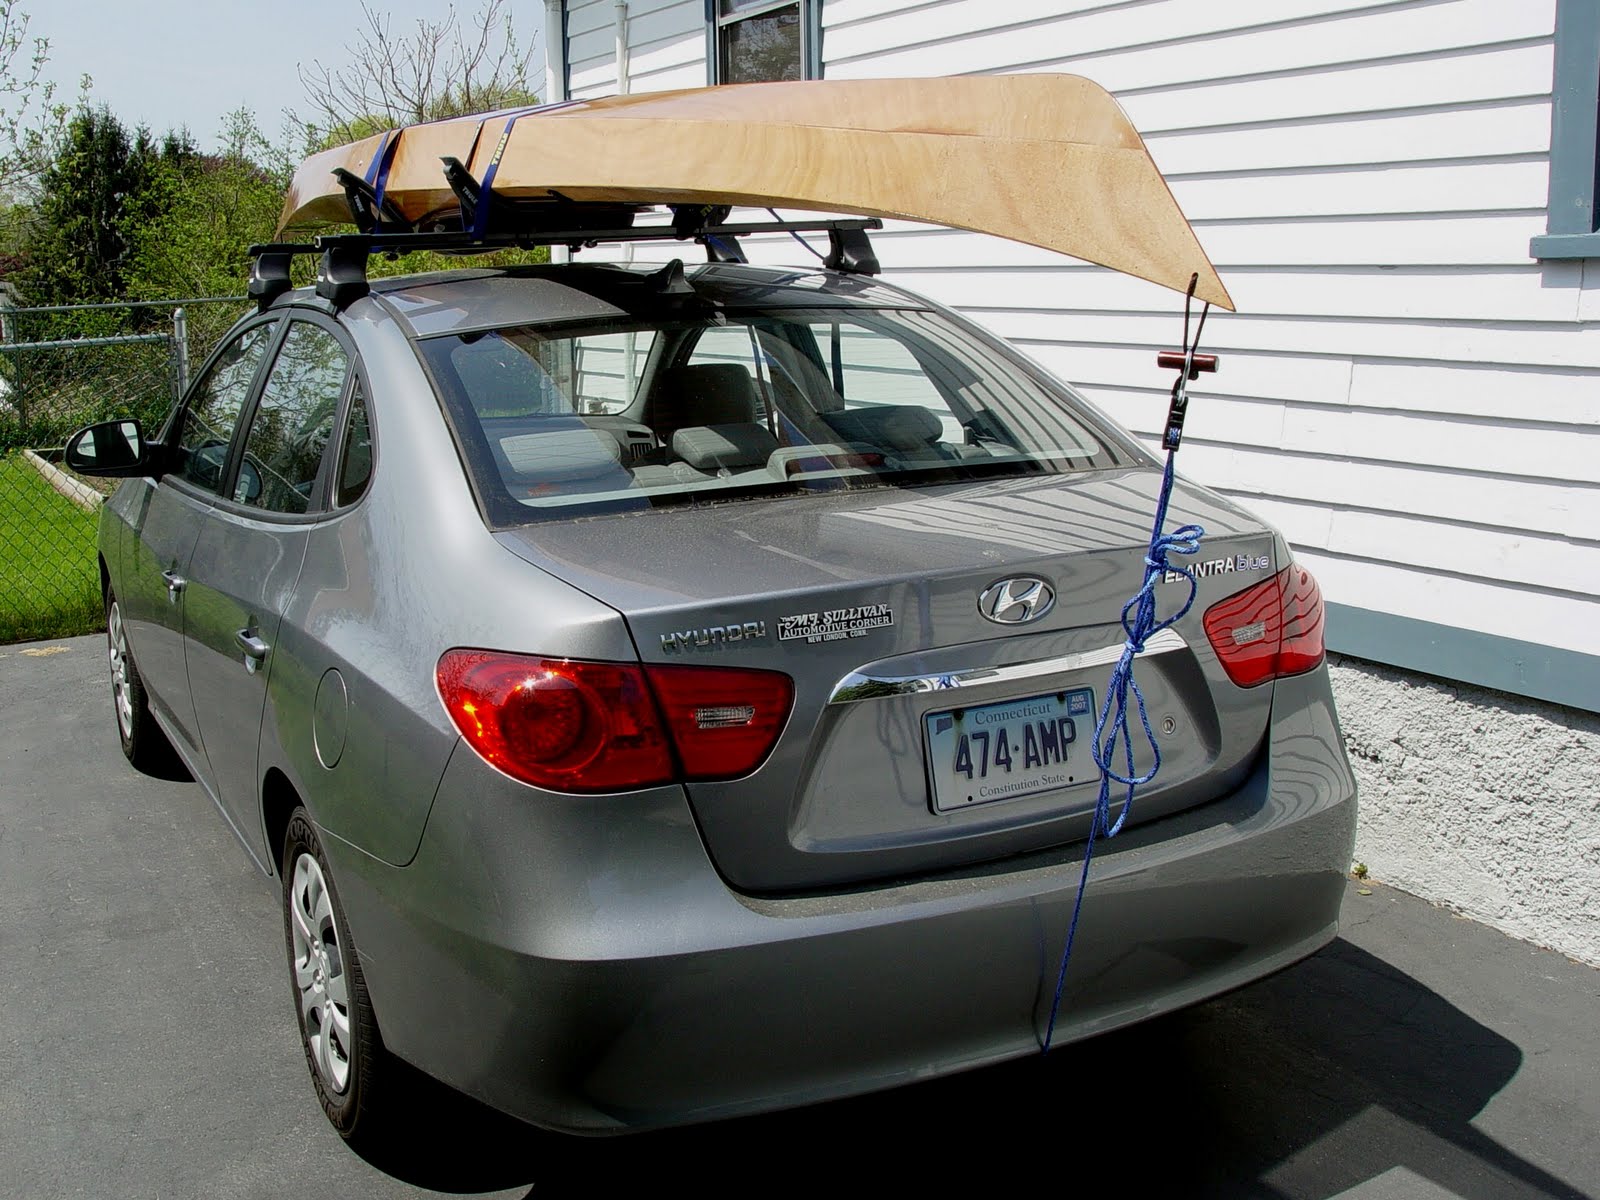
The car top arrangement works really well. Rock-steady. I love it when technical plans actually work out!

Sitting on the shore of my favorite "secret" lake in E--- L----

Surprising easy to carry. Still getting the hang of where the ends are, though.

Great to paddle! I actually shouted back to my friend "Damn, this thing is FAST!"

Odd facial expression due to cool air and cooler water.
I was profoundly impressed with the performance. Either because A: Its a very good kayak, B: Its my first "good" kayak , or C: All Of The Above. It seemed to slice though the water effortlessly. My "no-work-cruising pace was twice as fast as the old 'yak, and at "sprint" pace, I felt like I could have pulled a water skier. As predicted, the Initial Stability was a little shaky, but that mainly seemed challenging only when getting in & out. On the water, it took 5 minutes to get used to. The Secondary Stability is awesome-I could touch the water with the cockpit coaming & not budge.
I'll have a new addiction this summer.....
Saturday, May 7, 2011
My Project Sees The Light Of Day!


Rigging

Thursday, May 5, 2011
Carrying Toggles

Back Brace & Adjustable Seat
I didn't like the look of the seat that came with the kit, so I bought a "mild" Hot Seat. I added a layer of camping-pad foam. Instead of gluing it down, I contact-cemented velcro strips to the boat and seat. If it works well, I'll leave it, or I may end up gluing it down permanently, once I decide on the seat location.
While the camping-pad foam was comfortable, it unfortunately absorbs water, so I have since replaced it with what I should have used in the first place: minicell foam. I carved/sanded indents for my tailbones, tried it out today, and it seems comfortable enough.

 The Back brace was easy & straightforward to install.
While the camping-pad foam was comfortable, it unfortunately absorbs water, so I have since replaced it with what I should have used in the first place: minicell foam. I carved/sanded indents for my tailbones, tried it out today, and it seems comfortable enough.


Monday, April 25, 2011
Varnishing


This took longer than I thought it would. The hardest part is the "final" coat. I discovered a neat trick for "repairing" the odd brush stroke or fingerprint in the last coat. I saturated a paper towel with the 333 thinner, added a few drops of unthinned varnish to the pad, and went over the area, being careful to end the coating in an inconspicuous place. Sort of like "French Polishing"!
I do, however, sense that I'll give up on this level of perfectionism after the first outing....
Saturday, April 23, 2011

Friday, April 22, 2011
Sanding & Progress
I'm "finally" at the Final Sanding stage. Its tedious, even after I applied those smooth coats of epoxy with a squeegee. At this time, some builders start to make comments like "Its a kayak, not a piece of furniture", etc, and that thought has crossed my mind.
There are visible imperfections. In a few spots, I have over-zealously sanded down to the fiberglass. Oddly, when I wipe those areas down with alcohol, the 'glass disappears again. I hope this will be how it looks under varnish? As I hear, no matter how "perfect" the finish, it won't be after the first time I take it out. I'm going to finish the boat, and live with the results.
There are visible imperfections. In a few spots, I have over-zealously sanded down to the fiberglass. Oddly, when I wipe those areas down with alcohol, the 'glass disappears again. I hope this will be how it looks under varnish? As I hear, no matter how "perfect" the finish, it won't be after the first time I take it out. I'm going to finish the boat, and live with the results.
Tuesday, April 19, 2011
Hip Braces

Sunday, April 17, 2011
Glassing The Cockpit Coaming
Easier than I'd thought it would be.At least I get to do the highly-visible parts after much practice on less-visible parts.
I'm still using the lamp-heating method.
 I mixed up way too much epoxy at once for this job. When I looked at the cup, it was visibly steaming!
I'm still using the lamp-heating method.

Saturday, April 16, 2011
Cockpit Coaming Again
This is the assembled cockpit coaming glued on. I decided to use wood flour rather than silica to thicken the epoxy, in order to get a better color match.
 Oops, I did it again! I knew that thin coats of epoxy would take longer to cure, but after two days, I began to suspect that I'd screwed up again (Scene Of The Goof). After a suitable tantrum, I thought that this and the other time, the problem wasn't the mix ratio, but temperature. The leftover 1/2" of epoxy in the mixing cup hasn't cured yet, either. My basement averages about 58 degrees. They're really serious about that business of not leaving the epoxy on the concrete floor! I think that if the stuff is mixed at too low a temperature, the reaction will never take place.
I decided to try another tip: using lights to raise the temperature of the surface. I placed two work lights with 100-watt bulbs about three feet away from the boat. After two hours, the lamps have raised the temperature to 68 degrees.

I decided to try another tip: using lights to raise the temperature of the surface. I placed two work lights with 100-watt bulbs about three feet away from the boat. After two hours, the lamps have raised the temperature to 68 degrees.
Tuesday, April 12, 2011
Cockpit Coaming
 I decided to try something I read about on a message board. I thought it would make quite a mess to attempt to glue all the pieces together and onto the boat at once, so I've tried gluing the spacers & coaming together while clamped to the boat, but not gluing the assembly to the hull yet. I hope it will be easier to sand & shape off the hull. A very motley assortment of clamps:
Subscribe to:
Posts (Atom)