This is actually my second "go" at the deck. I removed the few center strips seen in the previous post. I had trouble getting them straight, and they were too thin, anyway.
I milled some new strips. I found lumber that showed a fairly straight grain from the side, and plain-sawed the strips. Much easier than all that re-sawing! I also learned that slightly thicker strips are more "forgiving" in joinery.
The part where the strips curve from the shear to the flat deck is a bear ! I ended up using 3/8" strips, and it seemed to take forever to get the tapering right. I got more practice using the heat gun to bend strips.
I'm finding that its easier to visualize certain things better while in progress, than in advance. For example, the big curve from the foredeck to the after deck looks "impossible" until you begin to do it, then it graduates to "difficult". For this reason, I still haven't decided which cockpit size to use, because I can't visualize how it will look without the wood in place.
After some consideration and consultation, I decided to raise the deck 1", and go with the design Ocean Cockpit. Sometimes, I just have to make up my mind-I can build all the kayaks I want!
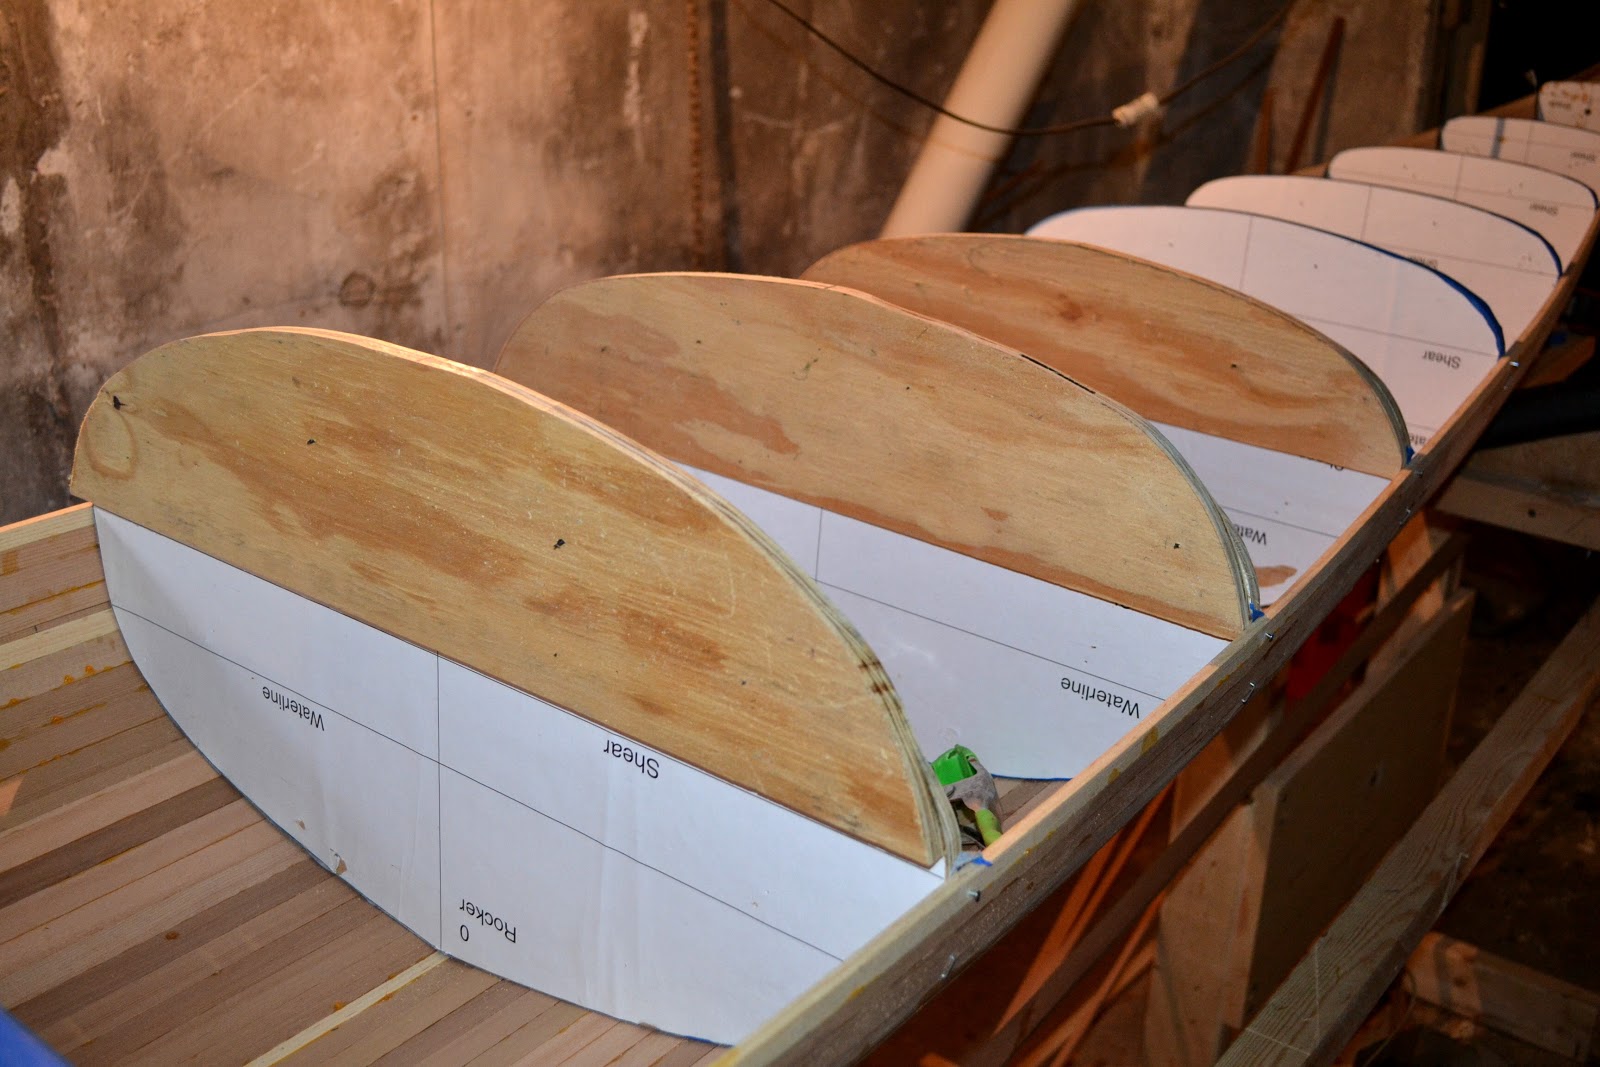
Per recommendation, I made form extensions. I also saw that if I kept the same shape on the sides of the extensions, it looked like a "wall" rising up from the sheerline, so I rounded the corners off a little. It seemed that three form extensions were adequate for a fair deck curve. The 1" lift looks considerable, and it looks like quite a drop down to the rear deck level.
I joined two 3/8" strips together at the center line. One 3/4" strip looked almost good, but I wanted to bevel slightly on the forms that are curved. The usual array of clamps and tape.