I am planning to take a crack at re-fiberglassing the O.I. this winter, but since its too early to start, I thought up a project for the interim: snowshoes. I had a lot of trouble finding plans-it was either low- cost snowshoes made of materials like plywood or PVC pipe, or "buy our beautiful kit for $175". No one had templates or much in the way of directions. I thought about laminating wood into a frame, but I couldn't figure out what size and shape to make it. I decided on "Ojibwa" or "Yukon" style shoes, and found some instructions.
His photo. He's bending the wood incrementally by soaking in a bathtub of hot water. I printed this, took measurements, and did some math to figure out the positions of the cross beams.

I made the frames of 3/4x3/4 ash and rounded the outside edges on the router table.
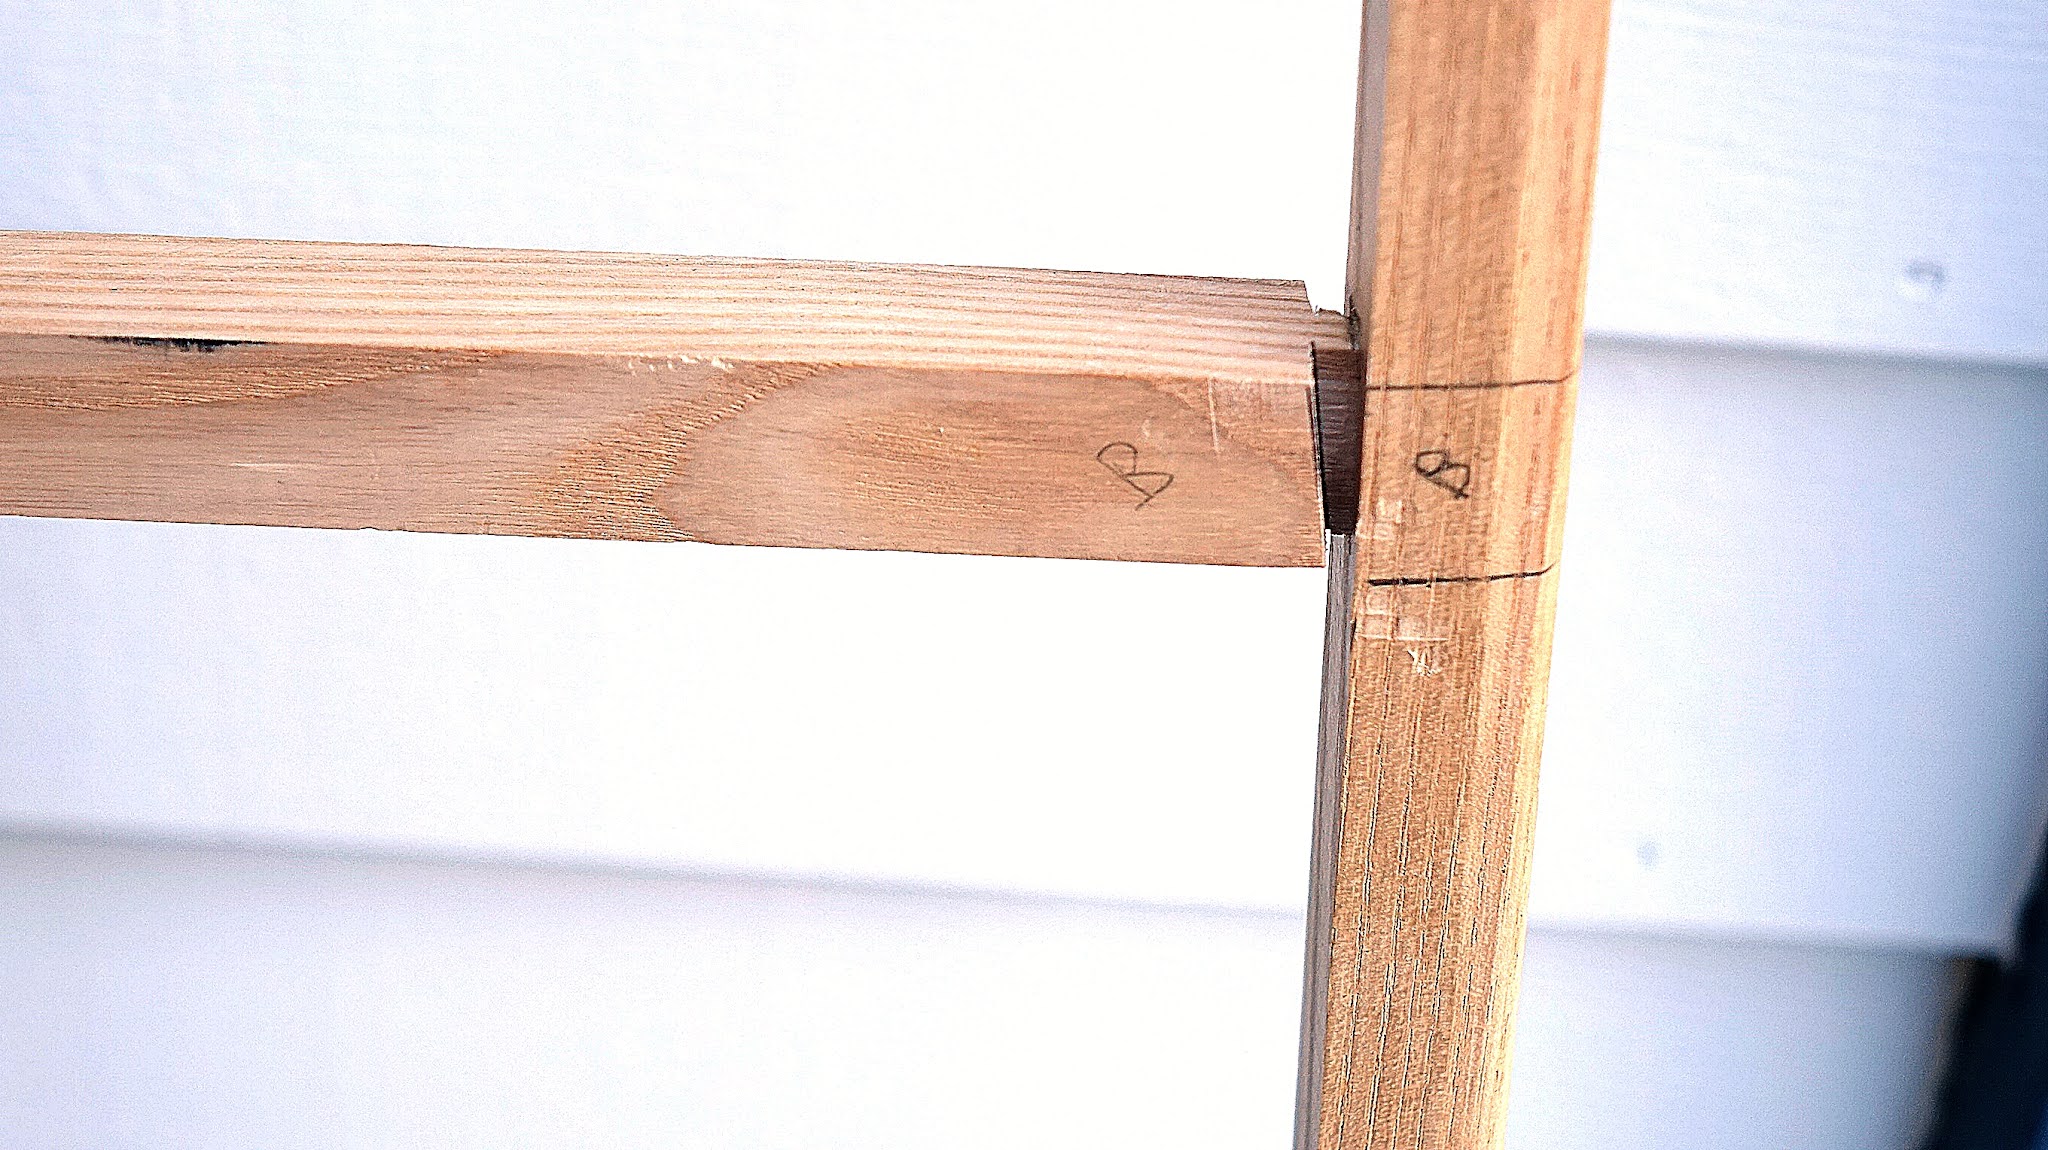
The original instructions seem to be anti-power-tool. He cuts mortises with a hand saw, whittles a dowel by hand, and drills a round hole in the frame. I did mortise-and-tenon joints on the table saw. As an afterthought, I also put a small angle on the tenons to accommodate bending.
I cogitated for a while about whether to bend the wood in hot water, as shown in the photo above, or use the heat gun. I thought that the water bath might provide more even heating for a graceful curve, so I decided on that method-however the frames didn't fit in my tub! 😉
I tried the heat gun, but I couldn't get the pieces hot enough to bend. These frames are three times thicker than the 5/16" cedar strips I'm used to bending.

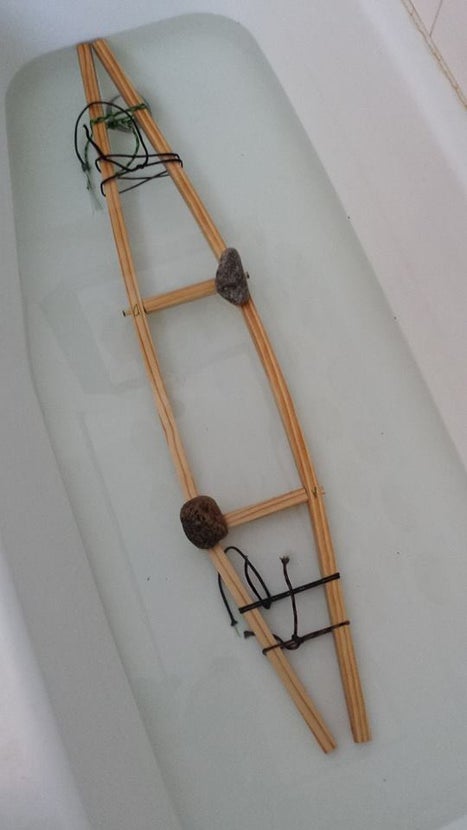
Plan C. I found a piece of 4" PVC pipe, glued an end cap on it, filled it with boiling water, and soaked the long pieces of the frame for 1 hour. The wood is held underwater with a rock.

This is similar to something I tried years ago. I had steam coming out of the end of the pipe, but a lot leaked onto the hot plate & floor. I think that when people succeed at steam bending, they have a lot of very hot steam bombarding the wood, and I didn't. I also (foolishly) tried using the hose from my Shop Vac, and ruined it. 😕

Rather brutal, but it was the first method that actually produced noticeable, permanent bending.


Paracord webbing of the toe section. Oh Boy. Very steep learning curve here. The closest thing I've done is the seat webbing on chairs, but this is much more complicated. I had major frustration finding an instructional video that didn't suck, and when I did, it was still frustrating to follow. Its hard to learn and hard to teach. There might be a mistake or two, but I'm going to live with them.


After the first brush coat of Helmsman Spar Polyurethane. The tubular nylon webbing really did soak up the goo a lot. The Paracord was a little easier to saturate. It seems like a long time since I brush-coated anything with poly. The poly really does shrink when it dries, tightening up the weave.
No comments:
Post a Comment