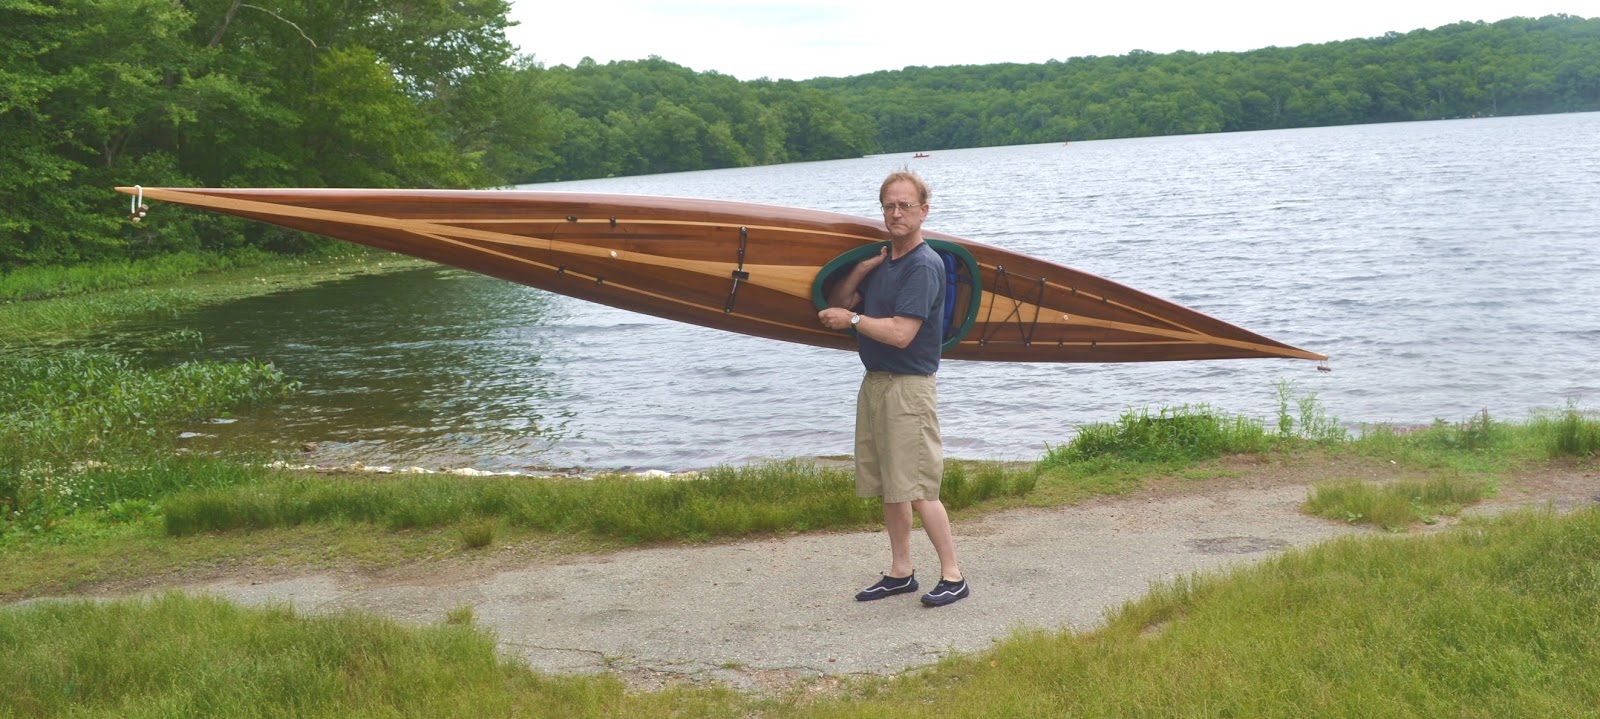
And of course, the traditional Trophy Shot:
Sunday, June 21, 2015
Done!
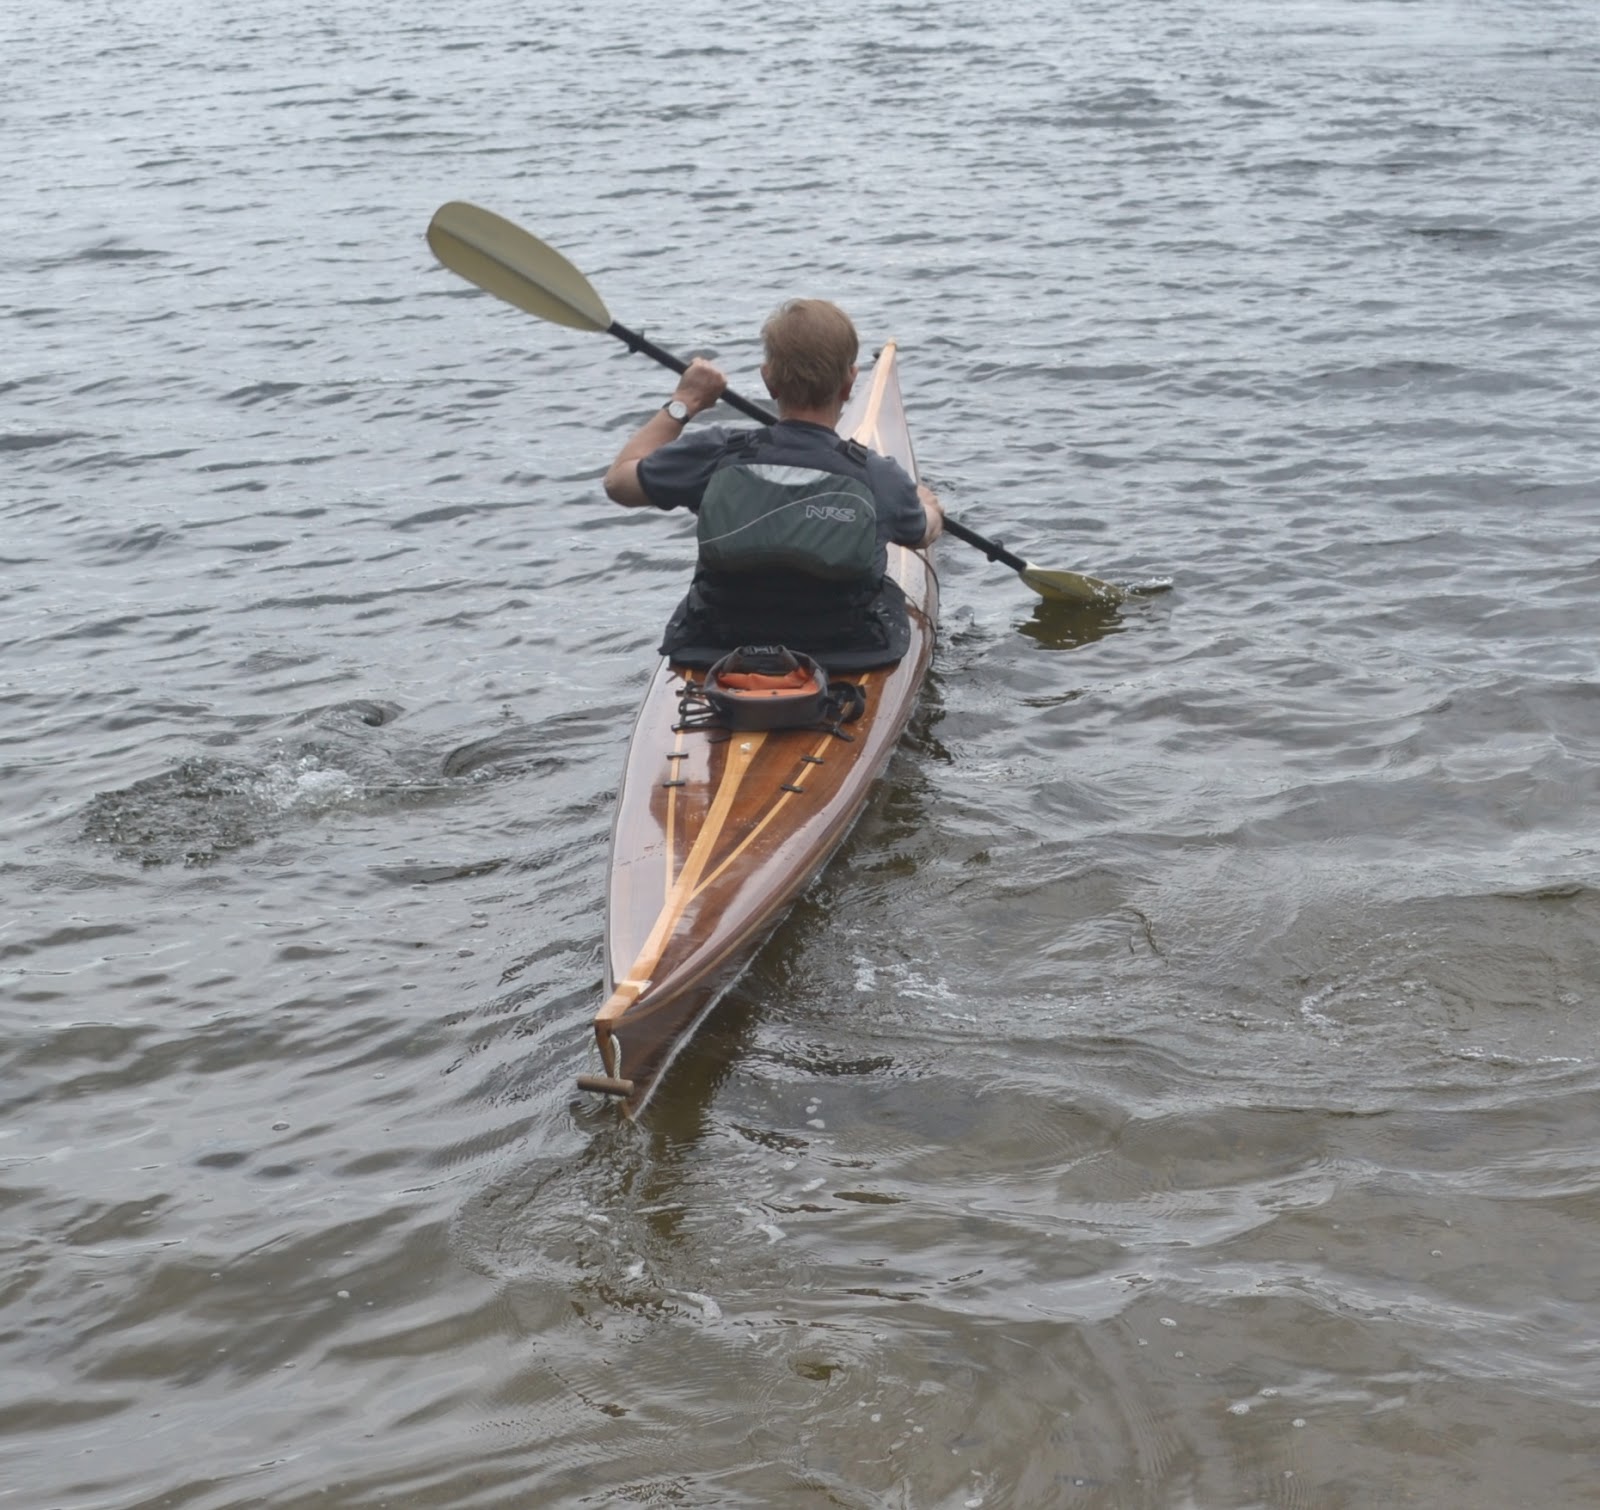
Off to the traditional lake for a tryout:
And of course, the traditional Trophy Shot:
I was actually surprised at how very similar the handling is to my first Outer Island. It may cruise a little faster-it was easy to maintain at 4 mph, and sprinted to about 5. The stability is almost identical to O.I. #1, which was slightly surprising, because I built it to the design length this time, and I expected it to handle just like Jay's, with the stiff tracking and solid secondary stability. It must be a Mystery Of Kayak Building-how two people can build to the same specs, and build two different kayaks.
And of course, the traditional Trophy Shot:
Outfitting
Went fairly easily & routinely. The hatches, grab handles, and deck rigging were done almost exactly as the last two builds, with one difference: I made a simple loop on the foredeck for my GPS.
I carved the foam seat as usual. I found it interesting that the side brace foam pads had to be of a different shape and position than I expected, and that the foot braces had to be extended to the third-to-last adjustment point.
Also, I confirmed that it is the cockpit size, more than the cockpit height, that allows butt-first entry into the kayak.
I carved the foam seat as usual. I found it interesting that the side brace foam pads had to be of a different shape and position than I expected, and that the foot braces had to be extended to the third-to-last adjustment point.
Also, I confirmed that it is the cockpit size, more than the cockpit height, that allows butt-first entry into the kayak.
Thursday, June 4, 2015
Finishing
I decided to finish the boat with automotive clear coat paint instead of varnish. I liked the idea of doing all the coats in the same day, instead of a week. I hung it up, because I was afraid to rest the kayak down on new coats of paint. I went through five cans of clearcoat, using about one can per coat. The coats seemed rather thinner than I wanted them to be, but I avoided runs & drips. I hope the coating is thick enough to be sanded & polished out.
Wet-sanding an 18' kayak goes much better when done in the backyard. I sanded with 500 and 1200 paper, then used the R.O.S. with a foam pad-rubbing compound, then polishing compound. It looks more like a semi-gloss finish at this point.
After a whole lotta sanding & buffing, I decided that I didn't like the look that I was getting. I used the wax remover, sanded one more time with #1000, and went for varnish.
Saturday, May 30, 2015
Cockpit Coaming
I decided to go for a molded fiberglass coaming. The plans for the Cape Ann came with appropriately-sized strips of mini cel foam. Glassing the deck went well, and I cut the opening to the size of my old templates. After trying a few things, I found some thin, junky plywood for the mold:
This was easier than it might look. I trimmed it down to the height of the foam pieces, and taped the foam down.
Next time, I may figure out a way to bevel the piece of foam & eliminate the gap caused by the curvy parts of the deck. It seemed like a big gap to be bridged only by tape.
I covered the whole thing with shrink wrap.
The layers of fiberglass. I started with 6 oz. glass-the bias-cutting thing really does help it work around curves. After four layers of 6 oz, and two of 4 oz, I thought I had built it up quite a bit.
After much scraping, grinding, fill coating, and sanding, I trimmed the edge, and tested the fit of my spray skirt. It fit just fine, and the whole thing released pretty easily from the shrink wrap. I gave it a coat of epoxy primer, and several coats of black paint. It was easy to bond it to the deck with dookie.
After some laborious trimming & sanding, I decided that it looked too "sinister" or something, and repainted it my favorite Jolly Green:
As I mentioned above, I thought I had built up quite a bit of thickness, but this came out to about 1/16". It seems strong enough.
The side & knee braces went routinely & well.
This was easier than it might look. I trimmed it down to the height of the foam pieces, and taped the foam down.
Next time, I may figure out a way to bevel the piece of foam & eliminate the gap caused by the curvy parts of the deck. It seemed like a big gap to be bridged only by tape.
I covered the whole thing with shrink wrap.
The layers of fiberglass. I started with 6 oz. glass-the bias-cutting thing really does help it work around curves. After four layers of 6 oz, and two of 4 oz, I thought I had built it up quite a bit.
After much scraping, grinding, fill coating, and sanding, I trimmed the edge, and tested the fit of my spray skirt. It fit just fine, and the whole thing released pretty easily from the shrink wrap. I gave it a coat of epoxy primer, and several coats of black paint. It was easy to bond it to the deck with dookie.
After some laborious trimming & sanding, I decided that it looked too "sinister" or something, and repainted it my favorite Jolly Green:
As I mentioned above, I thought I had built up quite a bit of thickness, but this came out to about 1/16". It seems strong enough.
The side & knee braces went routinely & well.
Friday, April 24, 2015
Closing The Clam
This was the toughest one yet. "Everyone" says to put the forms back in the hull while it sits after glassing, but I guess you have to do it immediately, which I didn't. The hull & deck mismatched by as much as one inch in places. My Home Made Aluminum Tool wouldn't even stretch it out enough.
I ended up putting spreader sticks across most of the hull. Tape wouldn't hold the two halves together, so I "tack welded" with epoxy. I tied strings to the sticks, so I could pull them out after the epoxy set. It worked!
I used 9 oz. tape to put the halves together, making the usual mess.
I ended up putting spreader sticks across most of the hull. Tape wouldn't hold the two halves together, so I "tack welded" with epoxy. I tied strings to the sticks, so I could pull them out after the epoxy set. It worked!
I used 9 oz. tape to put the halves together, making the usual mess.
Tuesday, April 14, 2015
Footbrace Stud Kit
Instead of drilling through the hull, I decided to go for these glued-in studs.
Kit from CLC includes some fiberglass tape. Vinyl tape protects the threads. I put them in before joining the hull & deck. It was all easier than I thought it would be.
Monday, April 13, 2015
Glassing The Hull
I did a rather crappy job on the hull interior, earning myself a lot of extra work.
It seems that, after building four kayaks, and having the same problems each time, I finally had a revelation about saturating the glass. I had usually been using too much epoxy in one place at a time, and letting it saturate too long. The fiberglass wants to float off the wood, of course unevenly, causing ripples. This time, I let it saturate a minimal length of time, and removed the excess thoroughly and immediately. I maintained a "wet edge', as with painting. Voila! Only one or two small ripples! The fill coats went well-nearly filled the weave on the second coat, in some areas.
Sunday, April 5, 2015
Interior
Having separated the two halves, the remaining forms came out easily. Smoothing the interior was just as much "fun" as usual.
Tools: the small Surform rasp was pretty useful. I also used a scraper made from an old saw. At the top is a surform rasp mounted on a bit of minicel foam.
I also resorted to filler on the resultant thin spots, and dealt with the internal stems by filleting the corners.
Glassing didn't go easily. The glass seemed to really want to pucker & lift off the wood. I tried the "saturation coat" that some builders use, but it mainly seemed a waste of epoxy. However, I think I'm finally learning what causes this-too much epoxy and too long a saturation time. The glass wants to float up to the top of a deep coating of epoxy, unevenly, of course.
Tools: the small Surform rasp was pretty useful. I also used a scraper made from an old saw. At the top is a surform rasp mounted on a bit of minicel foam.
I also resorted to filler on the resultant thin spots, and dealt with the internal stems by filleting the corners.
Glassing didn't go easily. The glass seemed to really want to pucker & lift off the wood. I tried the "saturation coat" that some builders use, but it mainly seemed a waste of epoxy. However, I think I'm finally learning what causes this-too much epoxy and too long a saturation time. The glass wants to float up to the top of a deep coating of epoxy, unevenly, of course.
Tuesday, March 24, 2015
Decking
I considered raising the deck 1", similar to the first O.I, but changed my mind. I found it a pain to extend the forms, and I really think that larger cockpit size, not the raised height, that made my O.I's cockpit more comfortable than the "design" cockpit.
This plan also made it much easier to make the drop to the stern deck. I didn't need to heat-bend the strips. I hope it works.
I also took a chance with the position of the forms, by moving the first stern deck form forward a little. This also eased the "drop" between the foredeck and stern deck. The boat is the design length, yet somehow it looks fatter than my 17' O.I. Not quite sure why.
But: Huzzah! For once, I managed to cut enough strips for the entire boat at once. I even had leftovers.
And, of course, the Obligatory Whiskey Plank Photo. I did this at 7:00 A.M, and skipped the shot.
I did the arrow-shaped center line, and another stripe of basswood, otherwise, its all red cedar. Once I get into the technique of stripping, I seem to forget about fancy design plans.
This plan also made it much easier to make the drop to the stern deck. I didn't need to heat-bend the strips. I hope it works.
I also took a chance with the position of the forms, by moving the first stern deck form forward a little. This also eased the "drop" between the foredeck and stern deck. The boat is the design length, yet somehow it looks fatter than my 17' O.I. Not quite sure why.
But: Huzzah! For once, I managed to cut enough strips for the entire boat at once. I even had leftovers.
And, of course, the Obligatory Whiskey Plank Photo. I did this at 7:00 A.M, and skipped the shot.
I did the arrow-shaped center line, and another stripe of basswood, otherwise, its all red cedar. Once I get into the technique of stripping, I seem to forget about fancy design plans.
Monday, March 2, 2015
The Other Side
I thought that the I-beam arrangement used for building the hull was too high off the floor, and it seemed even higher with the boat turned over, so I removed the beam, and went to the "summer" arrangement of saw horses and straps. Some of the forms fell out when I turned it over ( I removed too many staples), but they were easy enough to relocate.
Friday, February 13, 2015
Filling The Bottom
I used/remembered all the usual techniques for getting the strips in place-clamps, angle brackets, tape, wedges, etc. I decided on a "plain" bottom, no waterline accent strip or other fanciness. My worktable is higher than the last time, making the boat seem oddly "short & fat", and of course, everything looks crooked, depending on which angle I look from.
Wednesday, January 28, 2015
Stripping The Hull
During the weather-induced solitary confinement of The Big Blizzard, I had the opportunity to put quite a few strips down.
Of course, I stressed about the alignment of the forms, and moved a couple, but I also realized that every kayak I built in this small basement looked crooked while I was building it.
I used only one "cheater" strip, in the bow. I found that the bow & stern curves were not too extreme to deal with, and in a way, were actually helpful-more twisting & clamping, but less beveling of the strips at the bow & stern.
None of the boards I worked with are full length. I have to scarf two strips together to make a full-length strip. I actually find this easier than handling a bunch of 19' strips.
Sunday, January 18, 2015
Strongback & Stripping
As stated earlier, I firmly decided on a Ladderback, after building the cape on an internal. The last time I used a Ladder, I had used a very straight & level 2 x 6. This time, I used a 2 x 4. It was not absolutely straight, and the whole arrangement isn't quite level. I figured that as long as everything was plumb & level to the the stringline, it would be O.K-but it looked bad when set up!
When I actually started stripping, it looked normal. I used only two cheater strips in the stern (so far) and none in the bow.
Saturday, December 20, 2014
Starting The Build
I have decided not to put too much personal stuff about myself in this blog, so I'll just say that my health has improved enough that I'm motivated to start work. I figure that y'all are mainly interested in an upbeat blog about Wood 'n Water, so I'll skip the "Like sad and weepy part of our story-ory, my droogs" and get to it. :)
After having tried both, I'm glad to be using an external strongback. I made the I-beam of a 2x4 and a 2x6. I thought the old stands were rickety, so I made new ones of a different design:
Nice & solid.
Wood. I considered trying redwood, was talked out of it, went for Cedar and Basswood. Again, I found it difficult to resaw the "3/4" boards and get a good two 1/4" pieces, even with a thin-kerf rip blade, so I ended up planing them down to 3/16". I remember that this will cause problems with some of the fancy curves, but I have a while to figure it out...
Basswood was a surprise. In previous builds, I contrasted the cedar with pine, which was nice, but the wood tends to mellow down in color to almost the same tone as the cedar. The basswood is white. It has a rather nondescript grain-so much so, that I was able to plain-saw the boards. Some of it shows a little iridescence, like maple. Inexpensive, too, I laid in a healthy stack of strips for $30.
After having tried both, I'm glad to be using an external strongback. I made the I-beam of a 2x4 and a 2x6. I thought the old stands were rickety, so I made new ones of a different design:
Nice & solid.
Wood. I considered trying redwood, was talked out of it, went for Cedar and Basswood. Again, I found it difficult to resaw the "3/4" boards and get a good two 1/4" pieces, even with a thin-kerf rip blade, so I ended up planing them down to 3/16". I remember that this will cause problems with some of the fancy curves, but I have a while to figure it out...
Basswood was a surprise. In previous builds, I contrasted the cedar with pine, which was nice, but the wood tends to mellow down in color to almost the same tone as the cedar. The basswood is white. It has a rather nondescript grain-so much so, that I was able to plain-saw the boards. Some of it shows a little iridescence, like maple. Inexpensive, too, I laid in a healthy stack of strips for $30.
Monday, December 8, 2014
Outer Island II
I knew I'd build another kayak this winter.
My Original Plan was: to build the Cape Ann, use it, and the Outer Island, then decide which one to keep. However, my summer was disrupted with health issues, and after having used the Cape only a few times, I decided that I never really liked it much. Its a good kayak, however, I didn't visualize its dimensions accurately for my needs. I thought it would be my "small-go-to-weekday-boat", but in fact, it was larger in volume and heavier than the O.I. I just sold it via Craig's List.
Now that I have the room, I'll build another O.I, this time to the design length. I still have the station forms from the last build, and I won't deal with building techniques I didn't like, such as the internal strongback, and bead-and-cove stripping.
My Original Plan was: to build the Cape Ann, use it, and the Outer Island, then decide which one to keep. However, my summer was disrupted with health issues, and after having used the Cape only a few times, I decided that I never really liked it much. Its a good kayak, however, I didn't visualize its dimensions accurately for my needs. I thought it would be my "small-go-to-weekday-boat", but in fact, it was larger in volume and heavier than the O.I. I just sold it via Craig's List.
Now that I have the room, I'll build another O.I, this time to the design length. I still have the station forms from the last build, and I won't deal with building techniques I didn't like, such as the internal strongback, and bead-and-cove stripping.
Monday, August 4, 2014
Wood's Island
I used the Cape Ann several times, in order to get the "feel" of it, in preparation for a camping trip to Wood's Island. It seemed like every time I took it out to see how it would handle in rough conditions, the water was calm. Nevertheless, after postponing one trip due to the weather forecast, I decided to take it to Lake Champlain, whether camping or not.
There is also a geocache on Wood's that I wanted to find, so I used it as an excuse. On Saturday, the forecast called for a 50% chance of an afternoon shower, but I went for it anyway. The weather cleared up on the way, making for a pretty drive.
St Albans is an odd, out-of-the-way town, that looks like it used to be "more" than it is today. It smelled like corn.
I put in at Kill Kare State Park, using my camping reservation to get free parking, although I no longer had any intention of camping (heck, I paid these guys $20 already ;) By now the weather was HHH, so I way-marked the launch with my GPS, and navigated to the geocache: 2.3 miles. It was a pretty easy crossing, about 1/2 hour.
This is a beach made of flat chips of shale. I decided to land here, and hike to the cache. I'm actually glad that I decided to blow off camping-Wood's is nice, but not nearly as nice as Knight. The loop trail goes very close to most of the campsites, which are not nearly as good as on Knight. Saw some huge & amazing trees, however:
On the way back, stopped at Burton Island for another cache. It's a more "typical" concentrated campground, but nice.
I overdid it a little. It was 7:00 but the time I loaded up the 'yak, and much too late to think about driving home. Overpaid for a motel room, and had a rough night with my back. An amusing sight on the way home:
There is also a geocache on Wood's that I wanted to find, so I used it as an excuse. On Saturday, the forecast called for a 50% chance of an afternoon shower, but I went for it anyway. The weather cleared up on the way, making for a pretty drive.
St Albans is an odd, out-of-the-way town, that looks like it used to be "more" than it is today. It smelled like corn.
I put in at Kill Kare State Park, using my camping reservation to get free parking, although I no longer had any intention of camping (heck, I paid these guys $20 already ;) By now the weather was HHH, so I way-marked the launch with my GPS, and navigated to the geocache: 2.3 miles. It was a pretty easy crossing, about 1/2 hour.
This is a beach made of flat chips of shale. I decided to land here, and hike to the cache. I'm actually glad that I decided to blow off camping-Wood's is nice, but not nearly as nice as Knight. The loop trail goes very close to most of the campsites, which are not nearly as good as on Knight. Saw some huge & amazing trees, however:
On the way back, stopped at Burton Island for another cache. It's a more "typical" concentrated campground, but nice.
I overdid it a little. It was 7:00 but the time I loaded up the 'yak, and much too late to think about driving home. Overpaid for a motel room, and had a rough night with my back. An amusing sight on the way home:
Wednesday, June 4, 2014
Finished!
The obligatory Portrait
And the obligatory "trophy shot".
Measured 17', oddly 3" longer than the design length. Weighed in at a whopping 45 lbs.
We went to the usual lake for the maiden voyage, on a beautiful day.
This was a brief trial, but I made some observations. The higher volume seems to make it "bob" more than the O.I. Tracks well, and responds to leaned turns. The secondary stability is pretty good. I had my GPS mounted to the rigging-it seems to cruise very easily at 4 MPH, but I had trouble maintaining 5, and couldn't hit 6. I think the waterline length is actually longer than the O.I.
And the obligatory "trophy shot".
Measured 17', oddly 3" longer than the design length. Weighed in at a whopping 45 lbs.
We went to the usual lake for the maiden voyage, on a beautiful day.
This was a brief trial, but I made some observations. The higher volume seems to make it "bob" more than the O.I. Tracks well, and responds to leaned turns. The secondary stability is pretty good. I had my GPS mounted to the rigging-it seems to cruise very easily at 4 MPH, but I had trouble maintaining 5, and couldn't hit 6. I think the waterline length is actually longer than the O.I.
Saturday, May 31, 2014
Outfitting
Normally, I find outfitting to be the most fun of the build. This time, while it was still fun, I felt a little time pressure.
I covered the carved seat with spandex.
I decided to put the hatch toggles on the sides of the hatches. It doesn't seem to matter much, but I was pleased to find that a 7/16 weatherstrip seals it nicely. i used a simple knotted line for a grab.
Foredeck lines. I think/hope that these will hold my compass & GPS.
Simple knotted line for carrying loops.
A popular type of backband.
This type of backband has two straps in the back to hold it up. I didn't want to make a mess trying to cut slots in the cockpit coaming, so I just drilled holes & used cable ties.
Monday, May 26, 2014
Carving The Seat
I probably wouldn't have made a blog entry about something as "pedestrian" as carving a seat, but I found a trick online that made it much easier.
I basically botched the first attempt at varnishing-room to cold, uncooperative weather, re-coating too soon, etc, so I felt that I needed something that I could do in the meantime.
I simply googled "carving a foam seat", and found a totally different way to do it. "Everybody" says to use the angle grinder, but I find the thing too damned hard to control- it has too much power. The home made gizmo on the right is an old hacksaw blade folded in half & screwed to a board. Using it like a shave hook, it carves the foam quickly & easily. The surform rasp & sandpaper finish the job.
Side-by-side view of the Cape Ann , with (what I hope is) the final coat of varnish, and the Outer Island being re-varnished. The C.A. is of much higher volume than I imagined. I had originally planned for it to be a smaller "go-to" boat for "weekday use", but its considerably larger in volume than the O.I.
I basically botched the first attempt at varnishing-room to cold, uncooperative weather, re-coating too soon, etc, so I felt that I needed something that I could do in the meantime.
I simply googled "carving a foam seat", and found a totally different way to do it. "Everybody" says to use the angle grinder, but I find the thing too damned hard to control- it has too much power. The home made gizmo on the right is an old hacksaw blade folded in half & screwed to a board. Using it like a shave hook, it carves the foam quickly & easily. The surform rasp & sandpaper finish the job.
Side-by-side view of the Cape Ann , with (what I hope is) the final coat of varnish, and the Outer Island being re-varnished. The C.A. is of much higher volume than I imagined. I had originally planned for it to be a smaller "go-to" boat for "weekday use", but its considerably larger in volume than the O.I.
Thursday, May 15, 2014
More Cockpit Work
After the recess was done, I decided to lay up layers of plywood for the riser. It worked O.K, my spray skirt fits, but I decided that I hate the look of the plywood layers.
This is going to be painted.
Also, after cutting out the hatches, I found that I had made quite a mess with drips & runs of epoxy while joining the hull & deck. Grind, Scrape, Sand, etc. However, I can see that this kayak is going to have quite a bit of carrying capacity.
The coaming & lip primed & painted with polyurethane paint. I found it easier to varnish the cockpit recess without having to varnish the coaming & lip. That was always the site of annoying runs & drips.
This is going to be painted.
Also, after cutting out the hatches, I found that I had made quite a mess with drips & runs of epoxy while joining the hull & deck. Grind, Scrape, Sand, etc. However, I can see that this kayak is going to have quite a bit of carrying capacity.
The coaming & lip primed & painted with polyurethane paint. I found it easier to varnish the cockpit recess without having to varnish the coaming & lip. That was always the site of annoying runs & drips.
Subscribe to:
Posts (Atom)