As I suspected, it was a lot more work to get the hull interior smooth that it should have been. I started scraping & sanding away it it yesterday, and I ditched work, determined to finish. I resorted to putty fills in the dangerously-thin areas.
I decided to actually follow the instructions, and do the bow & stern areas first.
 Its getting easier. Both ends took a little more than an hour, and it seemed less frustrating than the last time I glassed.
The glass in between the ends went down fairly well also. I gave it two fill coats, sanded & varnished. I decided to paint the areas that will be visible inside the hatches.
This shows how it will look when finished-a little more "stripey" than I expected.
Its getting easier. Both ends took a little more than an hour, and it seemed less frustrating than the last time I glassed.
The glass in between the ends went down fairly well also. I gave it two fill coats, sanded & varnished. I decided to paint the areas that will be visible inside the hatches.
This shows how it will look when finished-a little more "stripey" than I expected.
Every Solution needs a Problem. I bought a small, waterproof GPS unit, and decided to try some geocaching.After the usual new-gizmo frustration, I managed to find a website & download a cache.
I found this after some more slightly comical learning-curve stuff.
It was well-packed. The trash bag was a nice idea. I didn't see any trash on the trail, so I took the bag to place in the next cache I visit.
Here is the rough opening of the cockpit. I was right when I thought that it was a steep drop from the foredeck to the aft-it still is, with the area in wood. I don't think I'll be able to raise the coaming the way I did on the Shearwater, with 1/4" plywood, I'm going to have to "Improvise".
Also, I had just enough wood left after fairing the area behind the cockpit. I didn't quite get the strips down to the level of form 10.5. I'm going to have to reinforce the area from the inside, and raise the height of the aft bulkhead a little.
Normally, this would be called "The Whiskey Plank", but I decided on "temperance" for two reasons: First, I had a stomach virus when I did it, and couldn't bear the thought of whiskey, and Second, there were so many, irregular, custom shaped boards in this build, that if I had a shot every time I put one in, I'd be in rehab now.
I can also see that I'm going to have to do a lot of corrective sanding & shaping. Oh well...
I was right in thinking that it was a heck of a drop from the extended front form to the rear deck. I couldn't really visualize it until I started working full-length strips on the sides.
I used the heat-bending technique, as for the stem & stern strips. I also offset the strips a little, like ship lap, to make it down to the deck. In future builds, I'll use the full 1/4" thickness for the strips, so I won't have to worry as much about running out of wood while fairing.
I can better see what has to happen now. I even resorted to a couple of screws to hold it down.
I also have committed to using the long cockpit opening. After weighing the Pros & Cons, I decided that I'd rather be comfortable than 100% aesthetic.
This is actually my second "go" at the deck. I removed the few center strips seen in the previous post. I had trouble getting them straight, and they were too thin, anyway.
I milled some new strips. I found lumber that showed a fairly straight grain from the side, and plain-sawed the strips. Much easier than all that re-sawing! I also learned that slightly thicker strips are more "forgiving" in joinery.
The part where the strips curve from the shear to the flat deck is a bear ! I ended up using 3/8" strips, and it seemed to take forever to get the tapering right. I got more practice using the heat gun to bend strips.
I'm finding that its easier to visualize certain things better while in progress, than in advance. For example, the big curve from the foredeck to the after deck looks "impossible" until you begin to do it, then it graduates to "difficult". For this reason, I still haven't decided which cockpit size to use, because I can't visualize how it will look without the wood in place.
After some consideration and consultation, I decided to raise the deck 1", and go with the design Ocean Cockpit. Sometimes, I just have to make up my mind-I can build all the kayaks I want!
Per recommendation, I made form extensions. I also saw that if I kept the same shape on the sides of the extensions, it looked like a "wall" rising up from the sheerline, so I rounded the corners off a little. It seemed that three form extensions were adequate for a fair deck curve. The 1" lift looks considerable, and it looks like quite a drop down to the rear deck level.
I joined two 3/8" strips together at the center line. One 3/4" strip looked almost good, but I wanted to bevel slightly on the forms that are curved. The usual array of clamps and tape.
After trimming the bow & stern keel end with a plane, I found the bends to be more extreme than I thought. 1/4" strips of pine and cedar would not make the bend without snapping. I went to 1/8" strips, and yellow cedar almost made the turn, but not without brute force.
I decided to try heat bending. After some advice, practice,trial, and error, got some results with 1/8" pine.
It seems as though the wood won't begin to bend until it is also about ready to burn. With some practice I got the stern keel strips done.
A typical barrage of tapes, staples, and brads to get it in place.
Happily the bow strips go down without any need for heat bending.
I'm glad I had a chance to practice this technique on the bottom, before I start the deck.
I laid up 3 1/8"x3/4" strips, and one 1/8"x3/8" strip on each end.
After some planing & sanding, I think that the 3/8" strip may not have even been necessary. I'm trying to sand the keel strips to blend into the 1/4" pine keel strip.
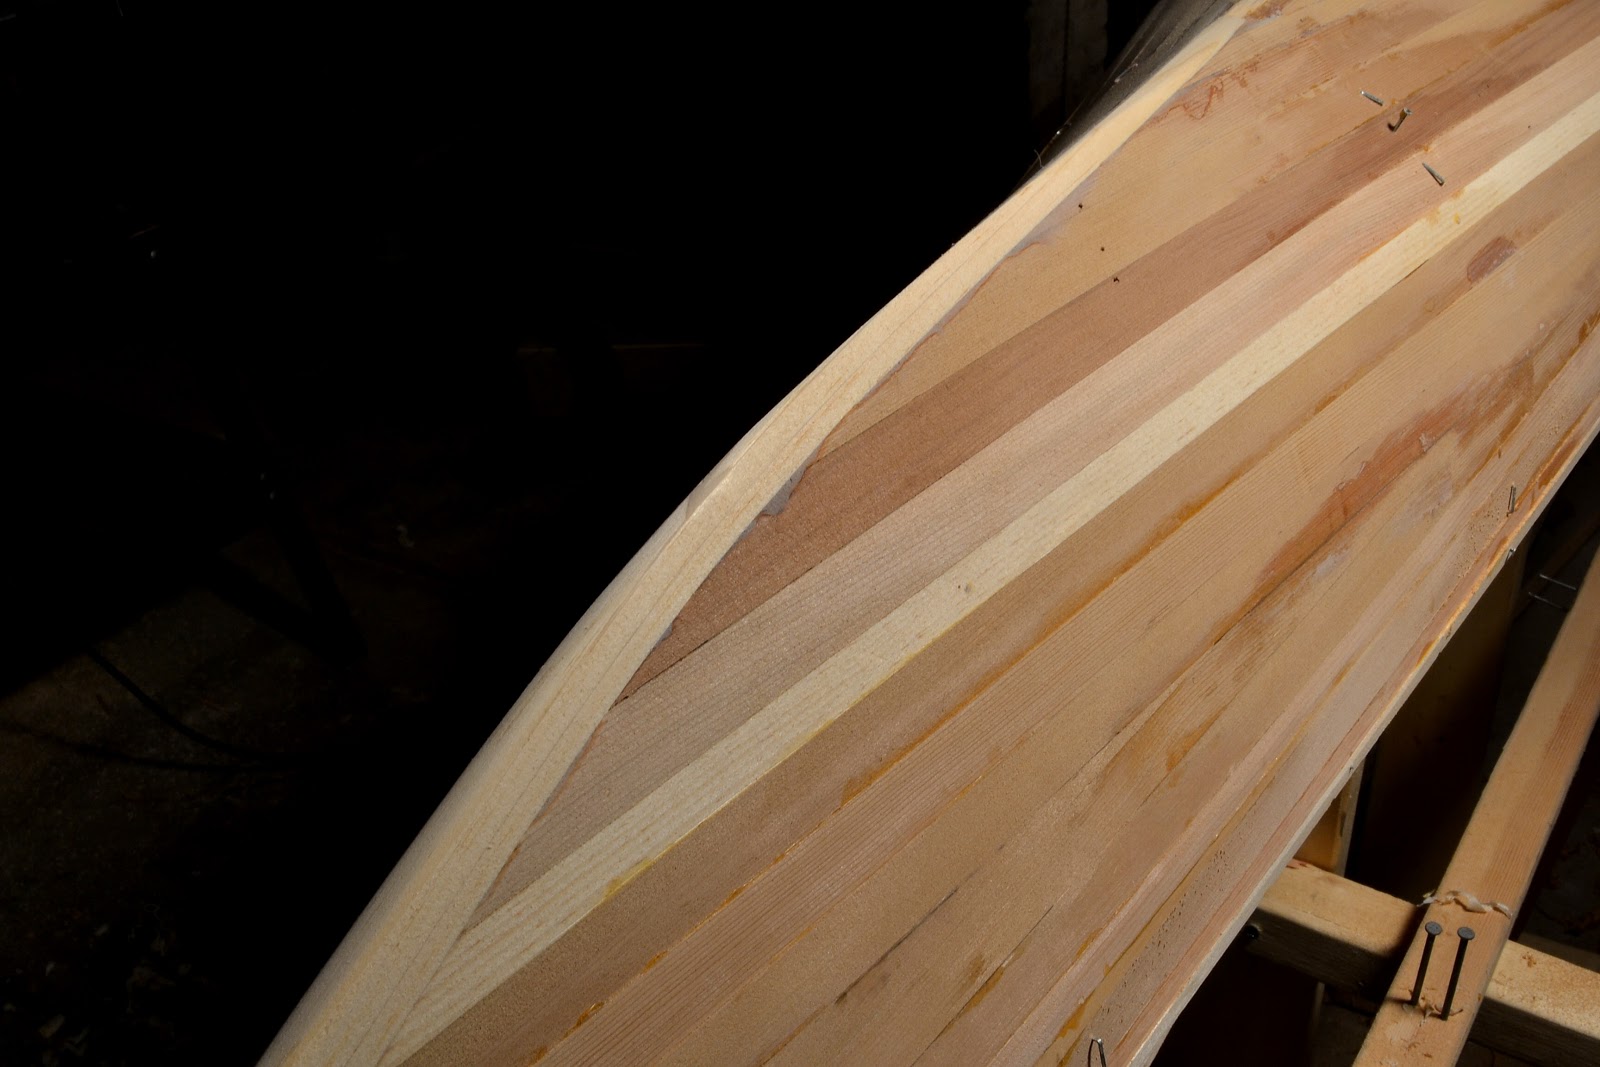
I decided to try Vaclav's technique for filling in large areas where where the full-length shear strips meet the strips laid parallel to the keel. I let the ends fall short:
Then I used a full-length 1/2" strip to mark the cutout. I had little faith in my ability to follow the line with a saw, so I stapled it on & used it for a cutting guide:
This was harder than I thought. This technique requires a lot of skill with the saw. My pullsaw was too aggressive, so I resorted to multiple passes with a utility knife. This unfortunately gave a sort of V-shaped cut.
Planing the strip was more difficult than I thought it would be. At one point, the tapered strip would fit in like a wedge, but pull a neighboring section too far apart, etc,
The strip in place. It was not exactly a "Voila!" moment. Some gaps that will need to be filled. After all, I think It might have been better to fit each end. I dont think I'll be trying this on the deck.
After having reached the first & last forms with full-length strips, I ran a 1/4 x1/4 pine strip the length of the keel, nailing it in with brads. I used a string line, stretched it straight, and generally ignored the center marks on the forms. It came out pretty fair, except for a lump around form #16.
I then ran the strips parallel to the center strip. This seemed ridiculously easy compared to the long strips near the sheer line. The lie much flatter, only a slight taper needed, and they naturally get shorter as I go along. I left the ends unfitted, since I want to try Vaclav's technique for "filling in large areas". More about that later.
My most-used tool for holding strips in place is plain old filament tape. It fits into small spaces, and you can really get a good squeeze with it, especially with multiple laps. I'm not an anti-staple purist, but I sometimes found that they don't really hold strips under a lot of tension.
Having finally filled the boat up to the waterline strip, I decided that if I build another stripper, I will not use a waterline strip.
I posted this picture because I think it is the first stage where it finally begins to have some curvature and shape that suggests some kind of boat. The usual barrage of L-shaped brackets and clamps. I found that filament tape works well to hold the strips together.
I'm surprised at how much easier is it to improvise on the second strip-job than the first.
Also pleased that the strips from both sides came together fairly evenly, to a workable V shape. I laid a 1/4" pine board down the keel line. Again, I found that if I followed the lines on the forms exactly, I came out with perceptible squiggles, so I stretched it straight down the keel line, and tacked it down with brads.
I also started planing the ends down to the forms. I have some cypress strips that were for the shear clamps of my Hybrid-I may try making keel strips of them.
I decided to use a different-colored strip along the waterline.
As I thought , it earned me a lot of work. All the instruction about laying parallel strips,
then filling the bow & stern ends with a few "filler strips" kind of goes out the window-I now have to use lots of tapered strips to match both the curve of the ends, and the curve of the waterline.
I think/hope it gets easier after this....
I think I'll hold off on the next picture until I can take one that shows more progress.
This was a tough day. My DSL modem blew up, spent half the day getting a new one to behave.
While making an adjustment to the Bow Form, the right-angle bracket that holds it on the strongback broke. I re-glued it with epoxy, and that, too, broke. I screwed it together, then discovered that all the reference marks that I made were now useless- I had to construct a new jig for a string line ,
re-level, re-plumb, and re-align the thing.
Then I tried taking the first strip along the shear line. Again, it showed waves & curves when aligned exactly on the marks. I removed and replaced nails until the whole strip looked fair. The strip came within 1mm of the marks everywhere, and I figured that there was no point in building strictly to the forms if some of them are misaligned.
I used a 1/2" strip, and had no problem making the curves at the bow & stern.
11-10-12
I couldn't exactly bring myself to post a photo of one strip on the forms.
as usual, I'm figuring it out as I go along. My idea this time, was to "take as long as it takes", which is good, but it also results in "glacial progress". At times, I feel like I'm making a Federal Case out of it.
I decided on a light-colored (pine) strip at the Waterline mark. It looks nice, but it also sort of cancels out some of the instructions I've read, like adding filler strips at the bow & stern until parallel strips can be laid to the shear line. I'm going to be doing a lot of trimming & fitting of strips.
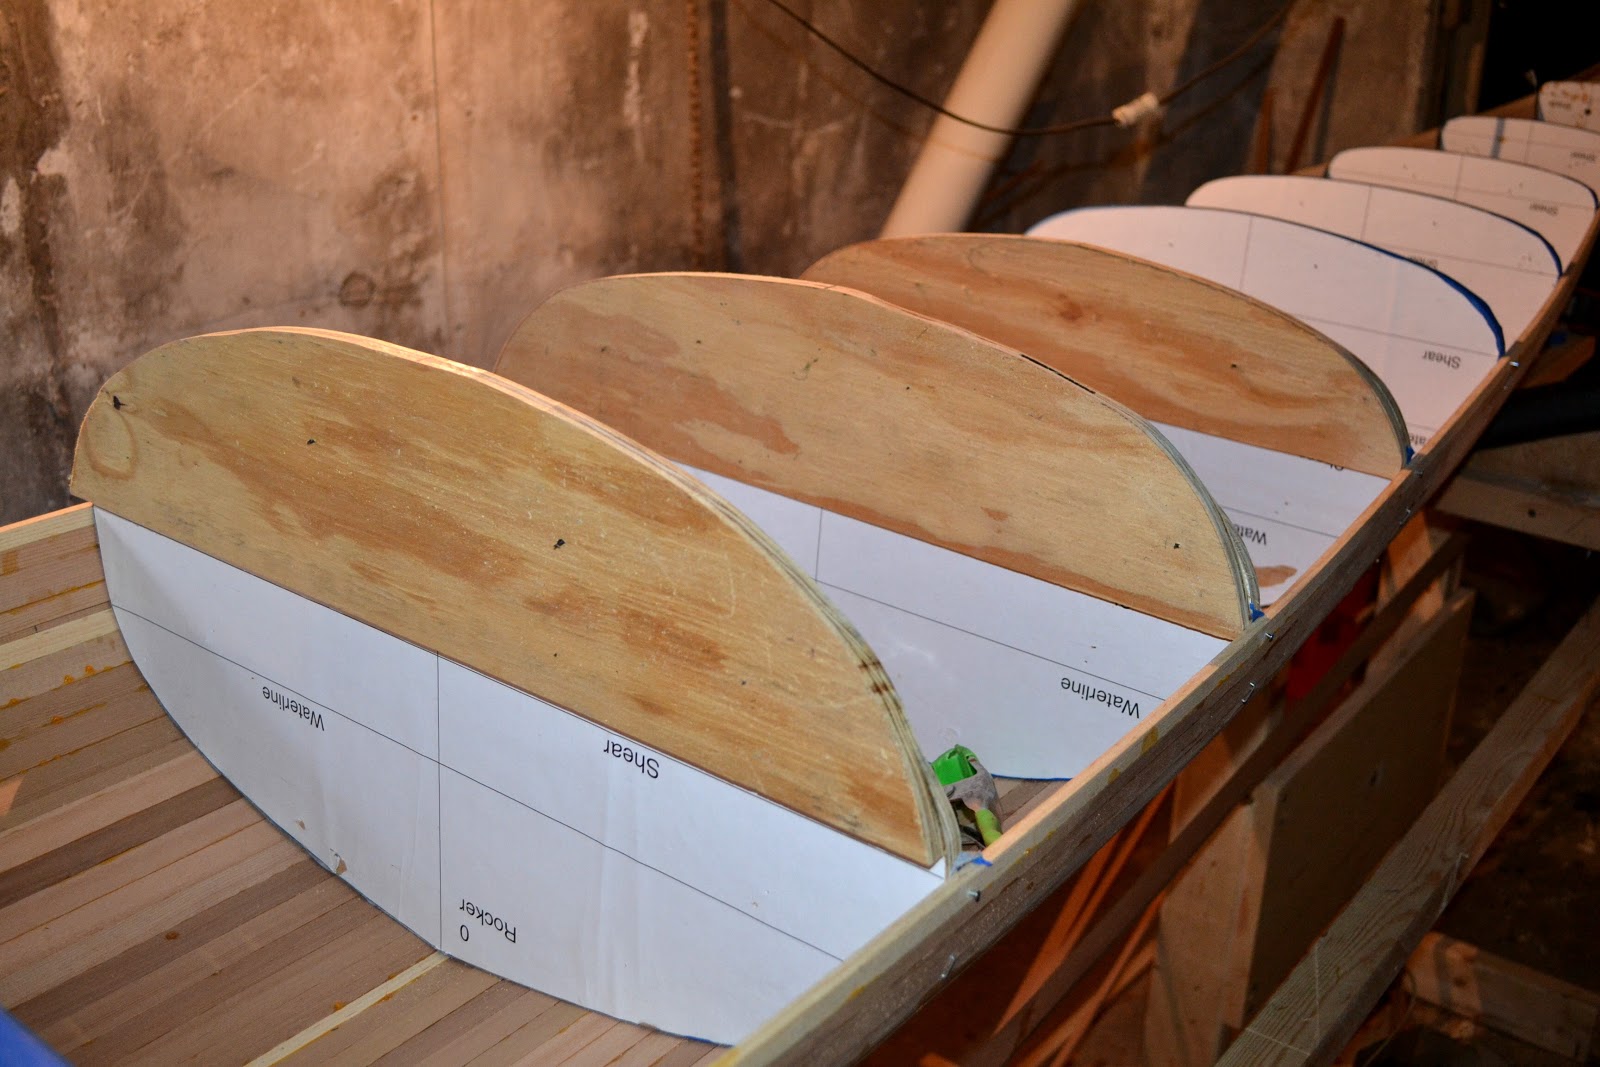
As stated in my earlier post, I gave up on the laid-up-plywood idea, and got a 2x6 and a 2x4. Much more rigid & straight, but it too, weighs "tons". The patterns are stuck to the other sides of the forms. Fairly straightforward to put together, and as usual, I "got good at it" by about Form 14. One error: I thought that a 6" width would make a nice, hefty platform, and it does, but Form # 2 was less than 6" wide, so I had to do some
Creative Carving. It gets less scary a few days after its completed. It looks pretty much like everybody else's picture of a strongback, so I must be doing something right.
11-1-12
Well, I was doing "something right, but not everything. In case I hadn't mentioned it yet, I decided to build this kayak at 96% of the design length. I usually remembered this, but not always-for example, I diligently lined Form #1 on the marks, forgetting that the position would be different on a shorter boat. As per the instructions, I placed strips along the shear line of all the forms, and found that I had to reposition four forms, including the bow form. I had no idea until I placed a strip on the forms.
I tried test strips on both shear lines, both waterlines, and 2 strips on the keel line. I think Its right.
I have firmly decided to build an Outer Island. Reasons:
1. I had been searching for a kayak that most closely resembled my Shearwater. After looking at Siskwit Bay, Disko Bay, and Night Heron, this boat was suggested on a message board. I had read that the Siskwit Bay was "not that fast". I simply could not stand the name of the Disko Bay. All I could think of was a Frank Zappa song ( Disko Baayyyy!) I tried the Heron at a demo & hated it. Then, as per my earlier post, I had the amazing luck of meeting Jay Babina by chance, and trying his OI.
2. I like the name. I like the fact that its named after a local place that's familiar to me, not someplace in Washington or Delaware, and its not named after a bird.
3. Not designed by You-Know-who.
The plans, and building notes are very good-all the information you need, without any unnecessary wit or opinions.
I resorted to using the table saw in my driveway, since my Shearwater had a coat of paint drying in the basement. Actually not a bad place to work, as long as the weather cooperates.
I'm working on the strongback here. I got some 3/4" sanded poplar plywood, figuring to lay up a double-thickness plank. I realized a day later that I'd cut it too short. I wasn't too disappointed, however, because it was very heavy & bendy anyway. I snapped out of it the next day and bought dimension lumber.
There are lots of islands in Narragansett Bay. Some large, some small, some inhabited, some uninhabited, some private, some open to the public. Dutch Island lies off Jamestown (Conanicut Island),
and its a "State Reservation", which I assume meant that its "open to the public"
This is Sheffield Cove. I had originally planned to put in at Ft. Getty, but they were still charging a whopping $20 to park. The good fellow at the entrance suggested this nearby, free-parking place.
Easy paddle over, right by Ft. Getty, with $20 still in pocket.
This concrete pier looked like a good landing place/landmark.
There is lots of Former Military Presence in Narragansett bay. Ft. Weatherill. Ft Getty. Ft Adams. And this island has fortifications, which I forgot the name of. They mainly seem to date from the Civil War to WWI. They all have those "Disappearing Rifle" emplacements. They must have been expecting an invasion of U-Boats.
Interesting place, with lots of ruins and old foundations. It was in-between "civilization" and "ruin"- some traces of cleared land, now gone to meadow, sidewalks that went nowhere but into dense brush, all strung with this 6" high vining weed that made walking in flimsy paddle shoes a chore. It seems that some use the place recreationally , there are signs of camping in some of the foundations.
This fort is in the center of the island. Its pretty similar to Ft. Weatherill.
I find it interesting that these type of ruins are fairly accessible to the public. Pretty crumbly, plenty of places to get hurt, but nothing stops the hiker from traipsing all over them. Where I come from, the whole place would be OFF LIMITS!, strung about with barbed wire,
and probably monitored.
Gun Emplacements.
Spooky, but surprisingly little graffiti. It really seems like few people ever come here.
The hiking was difficult, since many of what I thought were "trails" were actually deer tracks. I startled deer at least four times.
I made my way, with difficulty, to the other end of the island, which was more "open" and rocky.
Shale eroded with neat holes.
A cute rectangular lighthouse.
The walking was rough, even on the shoreline. There really was no clear path. On the way back, saw an imposing brick shell of a building, which I supposed must have been the barracks. I actually had trouble finding my way back to the pier, and nearly repeated by Whale Rock blunder, but tide & wind were favorable. Mighty rough on the feet, next time, I'll pack some proper hiking footwear.
3-11-13
I have since been informed that Dutch Island is not open to the Public, and that I was actually trespassing. There were supposed to be signs posted, but vandals must have taken them down.
I finally decided to install the hear hatch. After putting it in, I realized what a convenience it would have been when I went camping. In any case, lack of a Rear Hatch might have been a negative selling point.
I also decided that I wouldn't use foam bulkheads on the next build, so that gave me some 3" minicell to play with. I bought an angle grinder & carved this out. I tried it for about 1/2 hour, and it didn't seem "right", so I whittled it down some more, and it still doesn't seem great.
When I tried Jay's Outer Island, it had a custom-molded fiberglass seat. Absolutely no padding, but the most comfortable seat I'd yet sat in. I'm going to try that next.
9/1
I Tried making a mold of my butt in cement. 1st attempt was not auspicious, because I (stupidly) got concrete instead of cement. I used a great deal of Plaster of Paris to try & smooth it out. Then I tried again with mortar , making the mix looser & wetter than everyone recommends. That one seemed more like a "mold".
I also did a little more whittling on the foam seat, and gave it a one-hour trial today. It was better than I thought-didn't feel nice and cushy, but after 2 half-hour paddles, no numb legs!
I decided to paddle around The Thimbles yesterday. Being a Sunday, I was a little worried about the limited parking at the Town Dock. I did find a space within "portage" distance of the launching area.
I saw two strip-built kayaks waiting to be launched, and asked their owners a few questions. The turned out to be Outer Islands. I had been considering this design for my next build. I like the name-a kayak not named after a bird, or a body of water, and with Local Interest. When I shot a few technical questions, one guy said "why not ask the designer?", and there he was-Jay Babina! Talk about luck! What are the chances of running into the designer of the kayak you're considering building, on a random day, all 1/2 mile from the actual island the design is named after?
He suggested that we paddle together, which was fun. We talked a lot about designs. You can get so much good information from someone who is friendly, and isn't trying to sell something. For example, when I mentioned that I didn't like the Night Heron, he said, "Oh, everybody hates it. Its a mistake".
Jay in his Outer Island. A great looking Greenland-style boat.
We stopped at Outer Thimble island, which was "open" for visitors, and he let me test-paddle his OI. A great boat. It has a small feet-first-entry type cockpit, which I was no longer used to, and my knees were braced firmly against the rather low deck. Jay says that the deck can be raised, and I can enlarge the cockpit if I want to. I thought my SW tracked well, but this thing seemed to want to stay on course. Comfortable stability, and despite reviews not hard to turn, if you know how. Jay also helped me solve my quandary about leg discomfort. His OI's seat was the "tractor" style, molded of fiberglass, with no padding, and it was considerably more comfortable than mine. So, I'm starting to believe the "its not the padding, its the shape" School Of Thought.
Interesting to paddle with these guys. The two in OI's both had Greenland paddles, and seemed to be expending very little energy to set a pace which I had to work a little to keep up with.
What a lucky day!
Went to a CLC demo on the Hudson River in Yonkers yesterday. A hot day for driving. Drove through "interesting" neighborhoods to get to the canoe club, which was directly across the street from the City Jail, and then had trouble parking. It seems that the more "urban" the location,the more stingily apportioned any scrap of shoreline is. The club claimed a tiny beach of about 10 yards, and a few rocks.
It was crowded, and the space allowed for paddling was limited, so when I tried a Petrel and a Hi-Deck Night Heron, I didn't discover much. There was no room to get up to "sprint" pace. A man in a kayak bellowed directives: "Night Heron! Bear away from those rocks! Paddle on the right!", etc. Urban.
I stayed with the "urban" theme today, and tried the boat ramp under the Gold Star Bridge. Pretty average, as boat ramps go. Up into the harbor, against the wind, surprisingly rough, back downwind for some surfing. I still haven't perfected that art-it seem that the trick is to achieve the perfect "speed per wave".
I was somewhat disappointed with the 'yaks I tried yesterday. The NH felt very wobbly indeed, and while the Petrel was better, it was almost a little too "responsive". I may have to look farther for my next build.
I decided to repeat last year's Housatonic trip today, despite the heat. Interesting how much a waterway can change in one year. The water level seemed low, due to drought, and there either was, or I noticed, much more weed and algae.
The stretch of flat water between Bull's Bridge and Kent School is quiet. Few waterfront residences, and I counted only three motorboats on the shore-it must seem like there is "nowhere to go" in a motorboat.
 I thought I saw a tree stump that looked like a deer's ass, but it turned out to be a deer's ass. This one held the "headlights" pose for so long, I almost thought it was fake:
I beached near this bridge, and walked a couple of blocks to a store, and bought a beverage.
I think I must have been in better shape than last year, because the trip seemed easier & shorter than last year. Really hot, though. I resisted the urge to jump in several times, which is good, since the water was not very cool, and I'd only have gotten dirty.
On the way up, I had noticed a sign for "Lover's Leap State Park". I had also noticed it on the map, while checking out Lake Lillinoah. Funky little place!
I thought I saw a tree stump that looked like a deer's ass, but it turned out to be a deer's ass. This one held the "headlights" pose for so long, I almost thought it was fake:
I beached near this bridge, and walked a couple of blocks to a store, and bought a beverage.
I think I must have been in better shape than last year, because the trip seemed easier & shorter than last year. Really hot, though. I resisted the urge to jump in several times, which is good, since the water was not very cool, and I'd only have gotten dirty.
On the way up, I had noticed a sign for "Lover's Leap State Park". I had also noticed it on the map, while checking out Lake Lillinoah. Funky little place!
A nice iron bridge, which spans a gorge at the very head of the lake.
View from the bridge
The park has hiking trails (uphill in the heat, aagh!),one of which leads to this view:
And others lead to architectural oddities:
A most peculiar structure. Its split in half by a wall, and is held together by cables. It has upper & lower levels, connected by a little window. They must have run out of brick on the top.
Almost forgot to mention The Rocky River Hydroelectric plant. I had seen this place before, but only found it interesting after reading the history of Candlewood Lake. The Plant itself just looks like a typical Hydro Plant, so no photo, but you gotta see this pipe:
Thirteen feet wide. It filled 75% of Candlewood Lake, which lies right over the hill. It has a burly, turn-of-the-century-boilerplate look to it, all black & riveted, with a Diver Dan porthole.

 Its getting easier. Both ends took a little more than an hour, and it seemed less frustrating than the last time I glassed.