A collection of variously sized rocks spreading out to about 1 mile from the shore of Stony Creek, CT. Depending on what you call an "island" (is there a minimum size?) there are over 100 of them, but the consensus number seems to be something like 26. Rocks everywhere, anyone sailing a boat with a keel had better know where they are going!
Easy access from the Town Dock, if you arrive early enough to get a 4-hour parking spot.
Some of the islands are embellished with walls and fill, to make them "buildable"
Some of the houses almost seem bigger than the islands, as if the owners were determined to put something up. "I paid $$$$$$$$ for this island! I'm going to build on it!"
And some go all-out for opulence.
 This is Outer Thimble, one of the few uninhabited islands. A sign said "Island Closed", but I stepped off anyway. I head that they give tours, but it wasn't really that big.
Next to Outer Thimble is Horse Island, the biggest Thimble, owned by Yale University. If I had known that, I'd have visited.
Besides these two, its all very developed. You have an interesting geological feature, an archipelago of small islands, not too far from the mainland
This is Outer Thimble, one of the few uninhabited islands. A sign said "Island Closed", but I stepped off anyway. I head that they give tours, but it wasn't really that big.
Next to Outer Thimble is Horse Island, the biggest Thimble, owned by Yale University. If I had known that, I'd have visited.
Besides these two, its all very developed. You have an interesting geological feature, an archipelago of small islands, not too far from the mainland,
and the development rolls in.
 Is not actually a Point at all, but an island. It seems that it was one connected to Napatree point, but a hurricane separated them. Its fortunate that it got a nice name, instead of just being referred to as "The Sandbar" or something like that.
I set out from the Barn Island launching area. Very nice ramp, with a separate area for kayaks and canoes. They even had Port-O-Sans. Today being the Sunday of a long holiday weekend, it was very busy, especially with power boaters, who always seem "busy".
This was the first time I've taken the 'yak across a significant distance of open salt water, and I had to cross a busy channel , where power boats were leaving wakes. I'm beginning to like the way the Shearwater handles chop, punching its way along. I even did a few "nose dives", right up to the hatch.
Quite a few motorboats on the Point. Zero kayaks or canoes. Much of the shore is roped off as bird nesting areas, and everywhere else had boats at anchor. Maybe it was the Holiday Weekend Crowd, but it didn't seem all that friendly to kayaks.
Once back at the ramp, I got the saltiest compliment on my kayak yet: "Whoa! Look at that thing!"
Is not actually a Point at all, but an island. It seems that it was one connected to Napatree point, but a hurricane separated them. Its fortunate that it got a nice name, instead of just being referred to as "The Sandbar" or something like that.
I set out from the Barn Island launching area. Very nice ramp, with a separate area for kayaks and canoes. They even had Port-O-Sans. Today being the Sunday of a long holiday weekend, it was very busy, especially with power boaters, who always seem "busy".
This was the first time I've taken the 'yak across a significant distance of open salt water, and I had to cross a busy channel , where power boats were leaving wakes. I'm beginning to like the way the Shearwater handles chop, punching its way along. I even did a few "nose dives", right up to the hatch.
Quite a few motorboats on the Point. Zero kayaks or canoes. Much of the shore is roped off as bird nesting areas, and everywhere else had boats at anchor. Maybe it was the Holiday Weekend Crowd, but it didn't seem all that friendly to kayaks.
Once back at the ramp, I got the saltiest compliment on my kayak yet: "Whoa! Look at that thing!"
Yesterday, paddled from just above Bull's Bridge to Kent Village. A nice quiet stretch of flatwater, between two areas of rapids.
They watch the river ice?
The Kent School.
La Di Da.
Went to Bluff Point today , to Nick Shade's "Meet At The Beach". A very nice time! Eastern Mountain Sports was also demoing their kayaks, along with Chesapeake Light Craft. There were demo kayaks, builder's kayaks, and visitor's kayaks just about everyplace a kayak could fit, by the boat launching area.
As I expected, it was also a "demo day" for CLC. I got to test a Night Heron, which I was considering building. I liked it, but I actually think my Shearwater is faster. They also had some exotic models: a high-speed "Mystery" and the "Aleutesque".
I got many compliments on my Kayak build ;). I had originally wondered if the whole thing would be full of gorgeous, strip-built showpieces, and while there were a few, the mood was actually much more "come-one-come-all".
One of the skin-on-frame jobs.
Met some nice people. Home-built kayaks are good conversation pieces.
I got out of work today at 3:00, and couldn't resist loading 'er up. Went to Haddam Meadows Park, on the Connecticut river. I had sent my "modern" paddle out to be shortened, and used my home made one. I had also made a "Greenland"
paddle, according to plans I found on the net, but I never really liked it. First, because I made it from a pine 2x4, and it seems heavy. Reminds me of a cricket bat. It was also wet & noisy. So, I made a slimmer & lighter modified design from cedar, which I prefer. I'm considering trying to B.S. people, and call it a "Baffin Island Paddle" (haven't you heard of it?) In either case, there seems to be a whole lot of technique involved in getting the most from a paddle.
I like my Shearwater more & more. Very wind-neutral- I feel wind, but it seems to do nothing to the boat. I'd taken my old 'yak on the same paddle last year, and it weathercocked like mad.
 Saturday, the sun actually threatened to make an appearance, so I headed to the Great Island launching area in Old Lyme. First salt water paddle in this 'yak. A little bit of tough going around the south end, so I beached the boat for a rest on this un-footprinted little beach.
 Kayak in the reeds.
The rest of the paddle was easy, down the Back River. The cruising pace of this boat is very easy & efficient on flat water.
Kayak in the reeds.
The rest of the paddle was easy, down the Back River. The cruising pace of this boat is very easy & efficient on flat water.
The Big Day arrives. Cloudy & chilly, but I am undeterred.
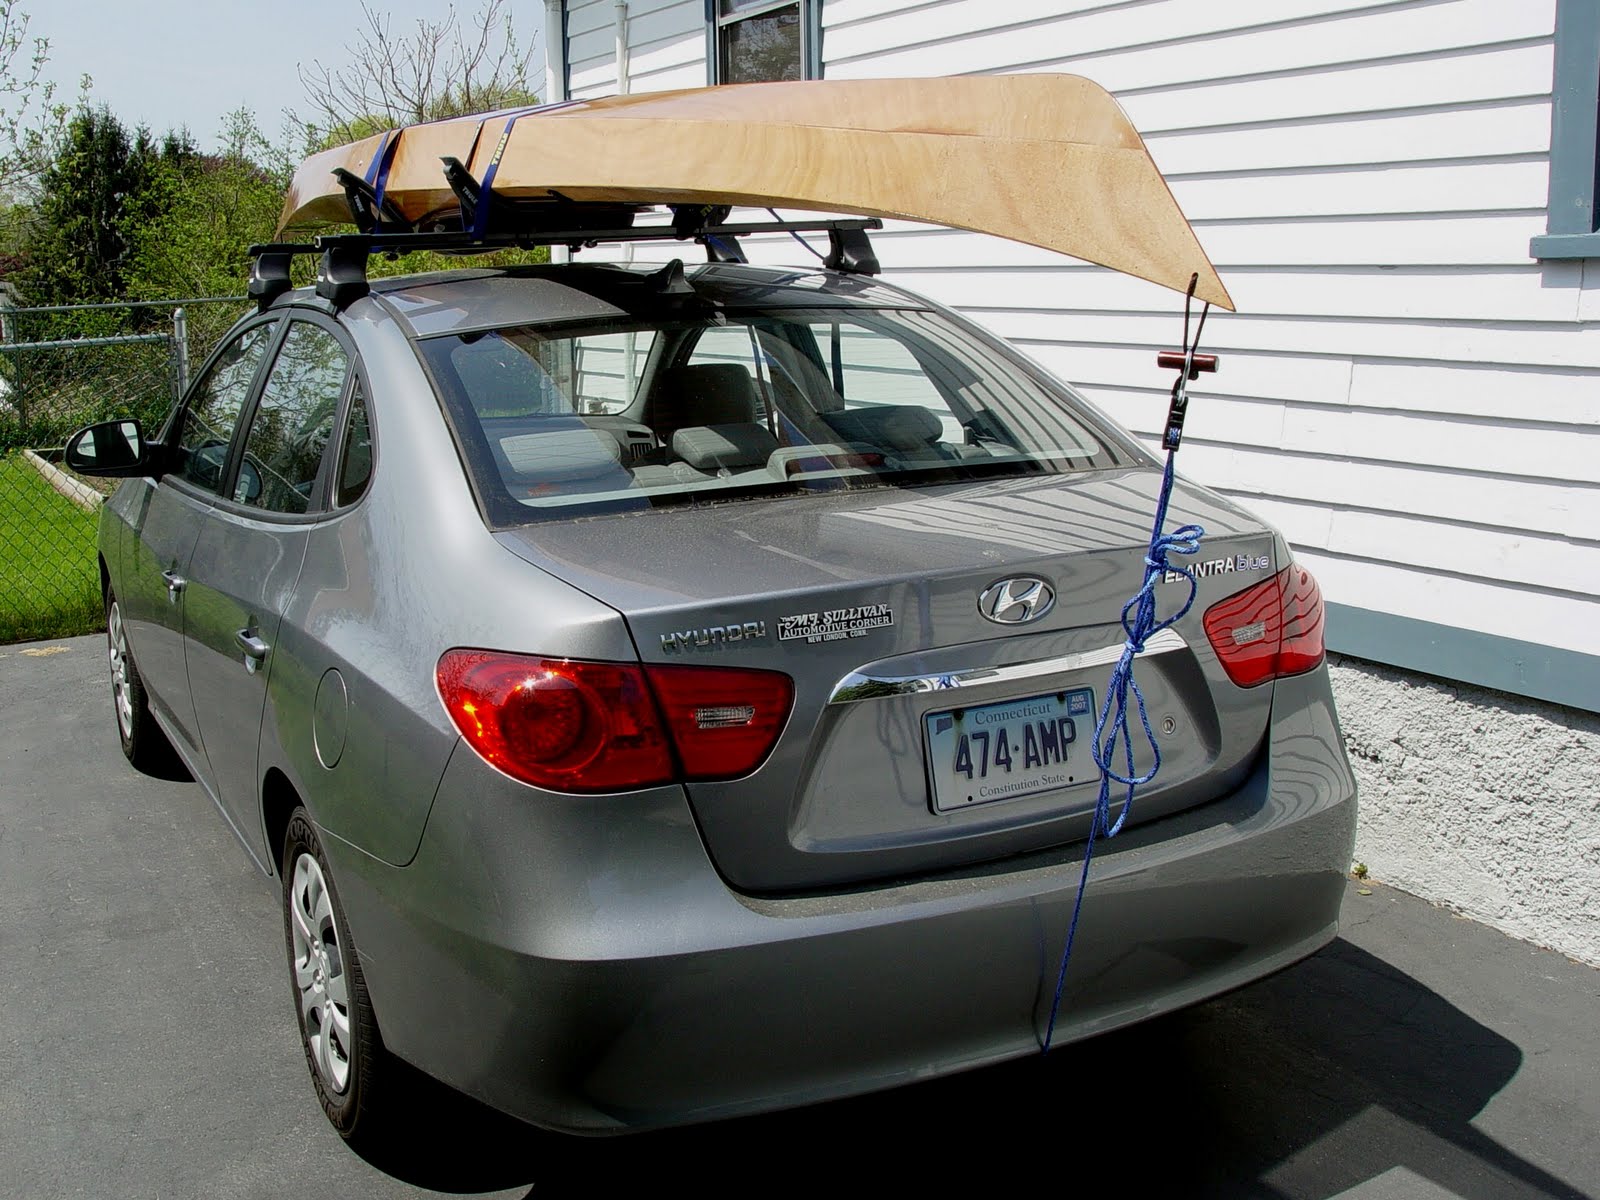
The car top arrangement works really well. Rock-steady. I love it when technical plans actually work out!
 Sitting on the shore of my favorite "secret" lake in E--- L----
Surprising easy to carry. Still getting the hang of where the ends are, though.
Great to paddle! I actually shouted back to my friend "Damn, this thing is FAST!"
Odd facial expression due to cool air and cooler water.
I was profoundly impressed with the performance. Either because A: Its a very good kayak, B: Its my first "good" kayak , or C: All Of The Above. It seemed to slice though the water effortlessly. My "no-work-cruising pace was twice as fast as the old 'yak, and at "sprint" pace, I felt like I could have pulled a water skier. As predicted, the Initial Stability was a little shaky, but that mainly seemed challenging only when getting in & out. On the water, it took 5 minutes to get used to. The Secondary Stability is awesome-I could touch the water with the cockpit coaming & not budge.
I'll have a new addiction this summer.....
Sitting on the shore of my favorite "secret" lake in E--- L----
Surprising easy to carry. Still getting the hang of where the ends are, though.
Great to paddle! I actually shouted back to my friend "Damn, this thing is FAST!"
Odd facial expression due to cool air and cooler water.
I was profoundly impressed with the performance. Either because A: Its a very good kayak, B: Its my first "good" kayak , or C: All Of The Above. It seemed to slice though the water effortlessly. My "no-work-cruising pace was twice as fast as the old 'yak, and at "sprint" pace, I felt like I could have pulled a water skier. As predicted, the Initial Stability was a little shaky, but that mainly seemed challenging only when getting in & out. On the water, it took 5 minutes to get used to. The Secondary Stability is awesome-I could touch the water with the cockpit coaming & not budge.
I'll have a new addiction this summer.....
Finished this morning around 10:00 A. M. Practiced getting it out of the basement.It is fairly easy to handle, although I did bump into a few things lightly. Weighs in at 44 lbs.
I had a seat in the cockpit to check foot brace and seat adjustments, and I was very pleased. It almost seems "made for me".
I also couldn't wait to check out the rack setup. I had been a little worried about carrying a long boat atop a compact car, but it goes up there very nicely:
I decided on a minimal amount of deck rigging. I don't like seeing kayaks criss-crossed & strung up with lines everywhere, but I thoght there should be some.
I turned these of Indian Rosewood, because my friend gave me a block of the stuff. She used to own a woodworking factory, and says that it was a leftover scrap from one of the U.S.S. Constitution refits! She originally thought it was teak, but I showed it to some experts who identified it as Indian Rosewood. The next time I found myself in Boston, I went on the tour of The Constitution, looking around for any sign of rosewood, i.e, in the Cabin, but didn't see any. I don't think Bonnie would lie about the wood ( she gave,
not sold it to me), maybe some bit of something was retrofit with this wood. In any case, its great stuff, straight & tight grain-I just had to make something out of it.
I didn't like the look of the seat that came with the kit, so I bought a "mild" Hot Seat. I added a layer of camping-pad foam. Instead of gluing it down, I contact-cemented velcro strips to the boat and seat. If it works well, I'll leave it, or I may end up gluing it down permanently, once I decide on the seat location.
While the camping-pad foam was comfortable, it unfortunately absorbs water, so I have since replaced it with what I should have used in the first place: minicell foam. I carved/sanded indents for my tailbones, tried it out today, and it seems comfortable enough.
The Back brace was easy & straightforward to install.
The first coat of varnish on the hull. I used a white high-density foam roller to apply Interlux Schooner Gold varnish, thinned 50/50with 333 Thinner, and a foam brush to tip off. The thinner really helps prevent bubbles, and allows a very thin coat. Interlux claims that Schooner Gold builds as much finish with one coat as other varnishes do with eight coats, and while that's a little optimistic, it does build faster.
This took longer than I thought it would. The hardest part is the "final" coat. I discovered a neat trick for "repairing" the odd brush stroke or fingerprint in the last coat. I saturated a paper towel with the 333 thinner, added a few drops of unthinned varnish to the pad, and went over the area, being careful to end the coating in an inconspicuous place. Sort of like "French Polishing"!
I do, however, sense that I'll give up on this level of perfectionism after the first outing....
Here's the boat, sitting on foam blocks, while I clean up the table. Its a lot of work, to get the basement clean enough varnish in. I have done this cleanup before-a long day's work. I vacuum everything that can be vacuumed-corner to corner, edge to edge, walls, floors, water pipes, electrical cables,
stairs, etc. Remove contents of shelves, clean & replace. First with the shop vac, then with the household vac. Non-existent dust can't settle on the finish. Its a "pain", but it works.
I'm "finally" at the Final Sanding stage. Its tedious, even after I applied those smooth coats of epoxy with a squeegee. At this time, some builders start to make comments like "Its a kayak, not a piece of furniture", etc, and that thought has crossed my mind.
There are visible imperfections. In a few spots, I have over-zealously sanded down to the fiberglass. Oddly, when I wipe those areas down with alcohol, the 'glass disappears again. I hope this will be how it looks under varnish? As I hear, no matter how "perfect" the finish, it won't be after the first time I take it out. I'm going to finish the boat, and live with the results.
These aren't the braces that came with the kit. I had to make new ones of luan, because I didn't know what the ones that came with the kit were, and I used them for something else! Pretty easy job.
Easier than I'd thought it would be.At least I get to do the highly-visible parts after much practice on less-visible parts.
I'm still using the lamp-heating method.
I mixed up way too much epoxy at once for this job. When I looked at the cup, it was visibly steaming!
This is the assembled cockpit coaming glued on. I decided to use wood flour rather than silica to thicken the epoxy, in order to get a better color match.
Oops, I did it again! I knew that thin coats of epoxy would take longer to cure, but after two days, I began to suspect that I'd screwed up again (Scene Of The Goof). After a suitable tantrum, I thought that this and the other time, the problem wasn't the mix ratio, but temperature. The leftover 1/2" of epoxy in the mixing cup hasn't cured yet, either. My basement averages about 58 degrees. They're really serious about that business of not leaving the epoxy on the concrete floor! I think that if the stuff is mixed at too low a temperature, the reaction will never take place.
I decided to try another tip: using lights to raise the temperature of the surface. I
placed two work lights with 100-watt bulbs about three feet away from the boat. After two hours, the lamps have raised the temperature to 68 degrees.
 I decided to try something I read about on a message board. I thought it would make quite a mess to attempt to glue all the pieces together and onto the boat at once, so I've tried gluing the spacers & coaming together while clamped to the boat, but not gluing the assembly to the hull yet. I hope it will be easier to sand & shape off the hull. A very motley assortment of clamps:
is one of my favorite tools. I've been using it for years to smooth wood, but it seems to be the perfect tool to smooth an epoxy coat, neatly decapitating runs & drips that I didn't even know were there. The thing is, that it cuts the material, rather than grinding it. The debris looks like tiny planer curls, much easier to clean up, and less hazardous than filling the room with toxic dust. It even works well on slightly "green" epoxy, that would clog sandpaper.
I made a little demo video about the scraper. Its basically the same as CLC's, but here it is:
http://www.youtube.com/watch?v=QtR1etP8CRk
This is what I certainly hope will be the last coat of epoxy, after all that sanding. I applied it with a foam roller, and tried a squeegee. I wish I had thought of the squeegee before! It smooths the glue out to a glass-like finish,
reflecting all the junk on my table with clarity.


 This is Outer Thimble, one of the few uninhabited islands. A sign said "Island Closed", but I stepped off anyway. I head that they give tours, but it wasn't really that big.